I’m usually pretty good at coming up with puns, but for this
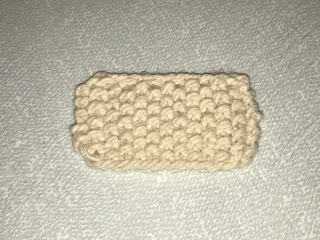
particular swatch I couldn’t think of anything. In this blog post I'll be demonstrating how I learned the seed stitch. This is called the seed stitch because it looks like there are seeds woven within the pattern. Learning this was pretty easy because it was just alternating between knitting and purling. It was very relaxing making this swatch because it was easy and knitting is pretty relaxing in general. So grab yourself some yarn and needles, play some Kehlani and you're set for a relaxing day.
Bulky Seed Stitch
Materials:
-
Bulky yarn
-
Size US 10 needles
-
Measuring tape
-
Scissors
-
Yarn needle
Gauge
-
16 stitches x 21 rows = 4” square
STEP 1
The first step to making the seed stitch swatch it to
cast-on. You will need to cast on 13 stitches.
STEP 2
Place the needle with the stitches in your left hand, and
the empty needle in your right.
STEP 3
Knit the first stitch.
STEP 4
Take the ball end of the yarn, bring it towards the front,
and purl the next stitch. When you bring the yarn to the front, be sure to go “under
the right needle” (White 97).
NOTE: If you want to learn the purl knit check out my
BLOGMAS blog post!
STEP 5
Bring the ball end of the yarn back to the back and knit the
next stitch.
STEP 6
Continue working across the row alternating between knitting
and purling. The first and last stitch of your row should always be a knit
stitch.
STEP 7
Repeat steps 3-6 until you reach your desired length for
your swatch.
STEP 8
Now for the final step, time for binding off and weaving in
the ends! You guys know the drill. If you don’t, check out my very first blog
where I go into detail about binding off and weaving in the ends.
What do you do to have a relaxing day?
White,
Stephanie. You Can Knit!: Knit and Purl Your Way through 12 Fun and Easy
Projects. Cincinnati, OH: Fons & Porter, 2015. Print.


No comments:
Post a Comment