Showing posts with label beauty. Show all posts

Saturday, January 27, 2018

Simply Glamorous; Gary's Guide to Gorgeous

Hello, welcome back to my final blog post, this is Ashley and today from the book Simply Glamorous by Gary Cockerill I am focusing on some of Gary's tips to gorgeous. I beleive these tips are very important to beginners and even to people who have been wearing make-up for a long time. 

There Are No Rules

"Individuality is the greatest gift we have and make-up is a great way to showcase this and exercise creativity and self-expression" (Cockerill 18). To me, make-up lets me show others my creativity and imagination. There are millions of make-up looks out in the world, ranging from eye looks to lip looks to the whole face. The way one shows to wear make-up gives off a sense of there personalty and can show how one feels about themselves. Personally I don't like to go to bold with my looks, this may show that I like the feeling of more natural make-up, and with me I have freckles so I must try my best to not completely cover those up because freckles are a made of me and they define something special about me. I like more natural looks on me like the one shown below, but of course like any girl, I like to go bold every now and then!

It's All about Balance

"When you're deciding what make-up look to apply, analyze the shape of your eyes and lips and decide which area you want to draw attention to... take your whole outfit into account, to ensure you look and feel gorgeous" (Cockerill 18).  I agree with this, especially when I decide to wear eye-shadow. Making sure your eye-shadow matches your outfit can be the key to tying it all together. Then, if you are wearing a more causal, relaxed outfit you would not want to go all out on the make-up, be careful not to lose that balance. For example the eye-shadow look below has a lot of pink pigment so this look would go best with more neutral colors, just to add some color and pop to the look.

Give Yourself Enough Time

Giving your self time includes the time that you will need to blend everything together. A look, in my opinion, is not complete if you have harsh lines all over your face. "Natural light and artificial light are very different, so make sure your make-up looks good in which ever you are going to be in" (Cockerill 18).  Personally for me I love doing my make-up in natural light because if it looks good in the natural light then it will look good in any light. Before school in the morning for me it is always dark outside so I am not able to open my blinds to get natural light, so I invested in a LED mirror, which gives you very nice white lighting. Here is the LED mirror that I do my make-up in every day:

Hygiene Is So Important

Cockerill emphasizes that it is very important to clean your make-up brushes regularly because it can carry more bacteria then a toilet, he also touches on how washing your hands before applying make-up and cleaning your brushes regularly is very important (Cockerill 19). When I go awhile without washing my brushes I notice my make-up starts going on more streaky, so regular brush cleaning is very important for both the application of the make-up and the sanitary part of it. Here is a great brush cleaner that I use from Sephora: 
This is the, Mini Citrus Brush Cleaner
Following these this can be very important, and according to them being called "guide to gorgeous" these can help you feel much more confident about your self, and ultimately improve your make-up techniques. 
What is your favorite skin care product? How long does it normally take you to complete a look?
Thank you for reading!

Cockerill, Gary, et al. Simply Glamorous: Make-up Transformations to Make You Look & Feel Fabolous. Jacqui Small, 2015.

Bobbi Brown Makeup Manual: SKIN

Hey, it's Giselle here again with another blog post! Today I will be going through skin care basics! In the book Bobbi Brown Makeup Manual by Bobbi Brown it makes it clear skin is very important and we should take care of it. Skin creates the base for all the work and makeup that you will put on your face. Things from your diet to your skin type can effect the different products that will work for you. In the book Brown states anyone can have smooth, glowing skin as long as you learn the basics of skin care and your type of skin along with some daily lifestyle tips (Brown 22).

Nutrition
There are many factors that can affect your skin. Eating right and drinking a lot of water alone can drastically improve and change your skin. Eating fresh fruits and vegetables can help you with taking vitamins which have many benefits for your skin. "Our bodies are 80 percent water. Without sufficient hydration, the skin cells become dry and flaky. To keep the body, including the skin, hydrated, eat foods with a high water content, such as fruits, vegetables, and clear soups, and drink at least eight glasses of water a day" (Brown 25). I strongly agree with this because I can tell the major difference in my skin from when I drink a lot of water to days where I barely drink any.

Skin Analysis
There are many different skin types such as oily, combination, sensitive, and dry skin. In the book they had a self-test skin analysis of different skin types and several ways of identifying your skin type. My skin type is oily, especially on my forehead and nose, I also have large pores around my nose, frequent breakouts, and few signs of aging. Next, they have recommendations for several skin types! For my skin type it requires regular cleansing, toning, and moisturizing.

Taking Care of my Oily Skin
It recommends to use moisturizer oil-free, water based moisturizer. It also suggest that soap and gel cleansers are the best for oily skin types. Toners are also great for oily skin! These are my favorite products to use. The moisturizer by Neutrogena is oil-free and the enzyme gel cleanser from Mario Badescu along with the cucumber and green tea facial spray.


Here I am cleansing my face with a spin brush which is great because it removes all the dirt and makeup off of your face and leaves the skin smooth!

 Now that you've read this post do you think the foods you eat can affect your skin? What is your skin type? And I would also love to know what are some of your favorite skin care products?


Bobbie, Brown. Bobbi Brown Makeup Manual: for everyone from beginner to pro. Springboard Press, 2011.

Monday, January 22, 2018

Simply Glamorous: Barely There

Hi, this is Ashley, and welcome back to another one of my blogs! Today I am going to do a "Barely There Transformation" from the book Simply Glamorous by Gary Cockerill. "Everyone would like to wake-up in the morning and look amazing, but few people feel confident enough to go out with no make-up on at all" (Cockerill 42). I completely agree with the comment, I would love to wake up and just walk out the door, but to be completely honest I do not have the confidence to do that, I always need to put on some sort of make-up, and that's why I cant wait to share with you this wonderful "barely there" look.
Cockerill started off the look by cleansing, toning, and moisturizing (Cockerill 44).  Moisturizing is my favorite part because of how dry my skin gets, and the natural glow the moisturizer gives me.
I use the Ultra Facial moisturizer from Keils and a rose water spray from Mario Badescu for extra hydration:

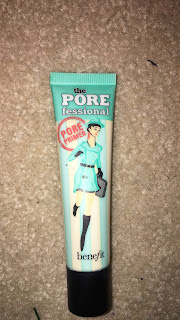
I have a lot of visible pores so I like to use the prime with the PoreFessional Primer from Benefit. I focus on applying this to my nose and out from my nose, middle of forehead, and chin.
I chose to use concealer for my Barely There look, but be careful because Cockerill did also state that concealer is a heavier consistency and can settle into fine lines, which can be aging (Cockerill 44).

Since my skin is so young and healthy I did not seem to have a problem with this.  I then set the concealer with a loose powder.
Loose Setting Powder from Laura Mercier. I applied with a fluffy make-up brush
Next, to bring a glow to my skin I went in with a champagne highlight color, as Cockerill also did in his look.
I use the Becca highlighter
You then would also want to apply blush. "The key is to make sure you don't take the blush too close to the mouth, so lift the brush off the skin when you reach the apple and then add a little color to the apple itself" (Cockerill 44). This emphasizes on how important it is to know exactly where you want to apply certain products to your face. I sometimes have a hard time putting on my blush, but after reading this tip I feel much more confident!
The blush I use is "Girly" from Ulta
"Shimmering eye shadow has a brightening effect and is very easy to blend" (Cockerill 46). I would have to agree with this, even just using one shimmery color can make it look like you put so much more effort into your eyes the you really did!
I then finished this look with mascara, and if you so please you can add a color to your lips.
I decided not to do every step in the book, because of my fair skin I like to keep the colors minimized on this look, so that's why I decided not to add eye shadow under my eyelids, a gel eyeliner, or contour.
Here is the final natural look I like to apply to my face in everyday photos:

Thank you so much for coming back to read my blog, and again I hope you found something useful in what's stated above. I truly hope this is a look you want to try out:) Be sure to come back for my next and final blog!
Thank you!

How much make-up do you like to put on? Do you like more bold looks, or more simple, natural looks?

Cockerill, Gary, et al. Simply Glamorous: Make-up Transformations to Make You Look & Feel Fabolous. Jacqui Small, 2015.

Chic Hairstyles: Part 5

Marley Smith: Period 6
Flipped Over Ponytail

Picture of hairstyle from the book
Looking professional doesn’t just mean the way you dress, the way your hair looks is important too. Recently I have been looking for a way to fix my hair for job interviews and other professional events. When I found this hair style I found a perfect way to achieve the professional put together style I was looking for.


Materials
-hair brush or comb
-elastic hair tie


The hairstyle I chose was something simple but still elegant. The style is called a Flipped Over Ponytail. This gives volume and body to this classic ponytail. It is an accessory in itself, although simple embellishments can be added. The first step to this look is to brush the hair out for any knots. Next you gather the hair into a loose ponytail that sits low on your neck. Then, you use your fingers to make a split above the elastic. Lastly, flip your ponytail through the split above the elastic (Butcher, 23).

My rendition of the Hairstyle
At first, I used a pink elastic to tie the hair with. However, this bright color made the look improper for a professional style. I couldn’t find a way to hide the elastic so I followed a tip in the book. The book states “Use hair elastics that match the color of your hair to keep them inconspicuous (Butcher, 22).” Adding the brown elastic to match the hair was a much easier way to complete the look than trying to hide the elastic.


After completing this look, I learned in order to look the part of a professional, simplicity is the key. A clean cut and simple look is sure to look great. This hairstyle perfectly suits this definition. Overall, I recommend this look to anyone who has medium-long hair. This hairstyle looked great and was the easiest one I’ve had to completed. It took very little effort and less than a minute to complete om myself. 


Would you wear this hairstyle to an interview or professional event?
Do you think that simplicity is a way to look professional?


Butcher, Christina. Braids, Buns, and Twists!: Step-by-Step Tutorials for 82 Fabulous Hairstyles. Chronicle Books, 2013.

Thursday, January 11, 2018

Chic Hairstyles: Part 4


Dutch Braid Pigtails

By: Marley Smith


I have tired many new braids through my previous posts and decided to build my skills on a particular one, the Dutch braid. The Dutch braid is created by adding in strands while you braid. But instead of crossing the new hair over like in a French braid, you're passing it from side to side underneath.


For this hairstyle, I decided to do Dutch Braid Pigtails. The braids are created by splitting the hair down the middle of the head into two equal sections. Next you Dutch braid along your hairline until you reach the level of your ear. Once reaching the ear add in all extra hair and start braiding normally (Butcher,65). Make sure to secure the hair with an elastic so the braid won’t come apart. Do the same on the other side of the head. You will then be left with a beautiful style that frames your face!


While creating this style I learned that it is easier to use a comb to ensure that your hair is parted evenly. I also learned it could be worn in different ways. In the book Butcher claims “By stretching out the braids you’ll emphasize their shape.. to keep the look modern” (Butcher, 64). This is an important tip because it helps the braid elevate from a simple look to a more complex one.


After completing this look I was amazed with the results. It was so
simple, fast, and looked great! The braided pigtails perfectly shaped the face leaving an elegant look. Best of all it took only about 5 minutes to complete and is a perfect go to hairstyle for someone in a rush!

Would you wear a Dutch braid in pigtails?
What would you do to get creative with this hairstyle?


Citation:
Butcher, Christina. Braids, Buns, and Twists!: Step-by-Step Tutorials for 82 Fabulous Hairstyles. Apple Press, 2015.

Sunday, December 31, 2017

Simply Glamorous: Correct and conceal

Hi, welcome back, this is Ashley and today I am focusing on the correcting and concealing part of ones make-up routine. Concealer for me has always been my go-to product. Most of the time I just put it all over my face how ever I feel like it with no structure, but after reading Gary Cockerills book Simply Glamorous, I now feel better about the kind of concealer I am applying and where I am applying that concealer. My skin also has a lot of discoloration and redness to it, so I find these correcting tips that I will discuss throughout this blog post, along with the concealer tips, very helpful:) I read in Cockerills book a question he is often asked, and that is "if theirs a difference between color correctors and concealers, and whether color correctors are really necessary," (Cockerill 30), his answer was "theirs a big difference and, yes, by incorporating color correctors into your make-up routine, you can not only cover up an area but neutralize it too, and ensure your make-up holds its color and disguises any flaws" (Cockerill 30). Although I like to incorporate these things into my make-up routine, I have always wondered those questions, and its very nice to know exactly why adding these two things, and applying them correctly is so important and useful.

Correct

There are various colors that you can apply to your face, all with different purposes. My personal favorite is green because it conceals redness, and is good for covering pimples according to Cockerill, and those two things are very present on my face which brings me to like the green color corrector very much. Along with green there is also lilac, " a pick-me up that brightens the skin and counteracts dull, sallow tones" (Cockerill 30). Something I like to use and i feel it does better then the lilac color especially for my skin is using a highlight (bright shimmery color) right above my cheek bone, and on the tip of my nose. Another color used for correcting is a peachy pink color, which brightens the area under your eyes (Cockerill 30). This will help with those bags we all get from stress or lack of sleep, so I find this color very useful.
Here you can see I chose to just apply the green corrector. I applied it to the parts that Cockerill suggested in the book (Cockerill 30), see the picture below that shows where Cockerill applies these color correctors. These are the main parts that my skin naturally has redness. 
(Cockerill 30) Here is the image that Cockerill included in his book. Here you can see where the green, lilac, and peachy pink colors were added to the face.
After I applied this color, I blended it together will a make-up brush then used my fingers to help soften down the edges so the green color wasn't so obvious.
Then you will want to go in and add concealer, like talked about below.

Conceal

The concealers I have are, stick concealers and liquid ones. Although I always do my make-up I have never really known which concealer should be used where. Reading this book has really given me insight to that, and I hope you take these tips to be useful, and I hope that my experience with them is beneficial. Cockerill states that stick concealers has a thicker consistency, and is good for blemishes and easy to apply directly on the area that needs it (Cockerill 31). This is very useful to know because I used to apply stick concealers under my eye, but now I know I shouldn't do that. Cockerill also states that liquid concealers is a multipurpose concealer and is easy to blend and apply, and gives a nice light coverage (Cockerill 31). I love liquid concealer because of how light and easy it is to apply.
Here is all the places I added concealer. I decided to go with the liquid concealer under neath my eyes, and then the stick concealer on all my blemishes.
After you add the concealer you will want to blend. I decided to not use any foundation in this look, so I just finished blending everything together, and finished the look off my adding a loose powder and mascara. 

Color correcting and applying concealer are very useful tricks to know how to apply properly when applying make-up, and I hope you can use my opinions I talked about, and Cockerill's professional opinion to create your best look possible. 

Have you ever experimented with color correcting? What kind of concealer out of the two I talked about (stick or liquid) do you prefer?


Cockerill, Gary, et al. Simply Glamorous: Make-up Transformations to Make You Look & Feel Fabolous. Jacqui Small, 2015.

Monday, December 25, 2017

Simple Glamorous: Contour

Hi, this is Ashley and I'm back today with yet another blog post about make-up! I hope you all had a chance to try out my last posts tips. Today I am focusing on contour. "Contouring is the art of using light and dark to enhance certain features and play down others. It can be used to sculpt cheekbones, chisel jaws, hide double chins, slim down wide noses, and lower high foreheads" (Cockerill 56).

To create the colors and look seen below, I used the NYX Wonder Stick, and the Dream Illuminateur Correcteur

On the left is the, NYX Wonder Stick,and on the right is the, Dream Illuminateur Correcteur.

Shadow
1:First you want to create shadow. Apply the darker color under and in line with your cheekbones, (Cockerill) start at the hairline and push the color towards the center of your face. Personally this is a really easy step and its okay if you do not get it perfectly lined up with your cheek bone because once you blend you will not be able to see where your original line was.
2:Then you want to take the color from the bottom of your ear and along your jawline,"this helps create definition and soften a heavy jaw" (Cockerill 58). Honesty with this I recommend using very light product and not making this line to dark because it is very hard to blend there, and in good lighting you will be able to see the line and will not create a flawless look.
3:Then you want to sweep the color under your chin and down your neck, this helps to lift the jaw, disguising a double chin and creating a more youthful appearance (Cockerill 58).
"To soften the temples and minimize a high or wide forehead, apply the dark color from the end of the eyebrows all the around the hair line" (Cockerill 58). I do not have a high or wide forehead but I still apply shadow here and I really feel that it helps warm the face and complete the look.
4:After this you will want to move to a smaller brush to contour the nose, mouth, and eyes. Cockerill states that to slim the nose you would want to put the contour onto either side of the nose and down under the tip (Cockerill 58).
5:For mouth: Apply a little bit of the dark color underneath the lower lip and the center of your mouth, "this pushes the area back, making the lips appear to come forward and seem fuller" (Cockerill 58). I have tried this step but my face normally gets really dry around there, and I personally leave this step out of my daily routine.
In the top picture you can see the contour that is going down either side of my nose and under the tip (see step number 4).
In the bottom left picture you can see the contour talked about in step number 1.
In the bottom right picture you can see the contour along my jawline and down my neck, see steps 2 and 3). 

Leave the contour, and continue on with adding the light color as demonstrated and instructed below, wait until the final step to start blending all the harsh edges.

Light

"Apply the light colors to areas that you want to add light and draw the eye toward" (Cockerill 59). Cockerill states that is best to stand in natural light and look in a mirror, he states the parts of your face on which light falls naturally are the areas to highlight (Cockerill).
Apply a light color underneath the eyes to minimize dark circles, draw a triangle shape. Apply the color between the contour on your cheek and on your jawline. For me, applying the color underneath my eye does miracles and will hide the circles that are obviously shown from not getting enough sleep!
Then move and apply the color to the center of your chin and above your upper lip.
Finally apply the lighter color to the middle of your forehead and take it down to the center of your nose. Personally after reading these tips and then going to try them out for my own I noticed that I already have very fair skin so the light colors don't show up as well and make it harder to blend, so next time I would most likely just stick to the shadow and very minimal light, although I highly recommend at least putting the light color underneath your eyes!
Here you can see all the places I added the lighter color

Blend Blend Blend!

Here is a picture with the shadow and light all blended together,  I used a large foundation brush to blend all the harsh edges,
Blend all of the colors with a sponge or brush, trying to soften the edges and create a flawless look.


I personally truly do like the look that contour gives to the face, it truly does make a difference! Reading all the places on where to put the shadow and the light colors did draw a more flawless look to my face. I hope you will be able to find these tips as useful as I did, and be sure to check out my next post!

How into contour are you? Do you feel confident adding all these darker and lighter shades all over your face? Do you enjoy the look that darker and lighter colors gives to your face?

Cockerill, Gary, et al. Simply Glamorous: Make-up Transformations to Make You Look & Feel Fabolous. Jacqui Small, 2015.

Wednesday, December 20, 2017

Chic Hairstyles: part 3


Instructions With Pictures

For my third hairstyle, I decided to and up-do called Dutch Crown Braids. This hairstyle creates a crown of hair to sit on top of the hairline. It is perfect for long hair because you can pin the hair all around your head to create a double crown look.  It is a great way to wear your hair up, and perfectly frames the face making it gorgeous for any occasion.

To achieve this style, it is helpful to brush out your hair to ease any tangles. Also, the book recommends using a comb to perfectly achieve diagonally parted hair for this style (Butcher,109). Next, I started Dutch braiding all the way around the hairline adding hair in from the part line of the model’s hair. The last step is to take the braids and to pin them along the hairline to create a crown look.


Me braiding one side of the models head

Tips:

In the book, it states that it is helpful to “finish the style by Stretching out the braids” (Butcher,109). When learning this tip it gave me a helpful way to make the look more voluminous. Another tip from the book was to add to the style by placing flowers in the hair (Butcher,108).  This is a good tip because it can turn the look from an everyday up-do into elegant hairstyle for special occasions.

I really recommend this braid because I was amazed by the finished look. It is a great way to wear your hair up and can be worn for many different events. However, it was a more difficult style than other ones I’ve done previously, so it is helpful to be experienced in braiding before attempting this hairstyle.

The Finished Look!

Do you like this hairstyle?

What occasions would you wear it for?

Make sure to keep an eye out for my next post to see another amazing hairstyle!


Butcher, Christina. Braids, Buns, and Twists!: Step-by-Step Tutorials for 82 Fabulous Hairstyles. Apple Press, 2015.

Sunday, December 10, 2017

Chic Hairstyles: Part 2


As I have practiced more hairstyles I have improved my skills, so I have decided to try a more complex hairstyle. The hairstyle I tried was called a fishtail braid. This braid looks elaborate and difficult but is surprisingly easy to master!

I started off the look by thoroughly brushings the model’s hair to remove any knots. Then I split the hair into two equal sections. The book encourages that you should hold one side of the braid in each hand and keep the sections separate as you braid (Butcher, 51). This helps to make the braid look more put together. Next, I crossed sections from their hair form each side repeatedly. The result was an amazing beautiful hairstyle with a unique texture!

Tips:

Step by step pictures
A tip in the book stated, “When you’re learning to fishtail braid, it’s easier to put your hair up in a ponytail” (Butcher, 51). This was the most helpful tip because I had just learned how to do this hairstyle. This tip provided me a helpful way to keep the hair in place, especially for layered hair. Another tip was to wet the hair a little before styling (Butcher, 51). I found this helpful because it I learned that it was a way to make the braid become more precise. Also, the damp hair was much easier to brush out and hold.


Me in the process of braiding


Overall, I recommend this hairstyle for people with long hair. I found it hard to complete on people with short hair because the layers of their hair made it hard to make even sections. On the long hair, I found this look to be quite easy to complete, but a little time consuming. However, I feel that the braid was worth the time! It is easy to personalize and can be worn tighter for a put together look or loose for a bohemian one!
Finished look!


How useful is this hairstyle, and how often would you use it?
Also please make sure to check out my next post for another chic hairstyle!


Source:

Butcher, Christina. Braids, Buns, and Twists!: Step-by-step Tutorials for 82 Fabulous Hairstyles. London: Apple, 2015. Print.

a

Thursday, November 30, 2017

Bobbi Brown Makeup Manual: EQUIPMENT

    HelloI'm Giselle Cruz and I decided to pick a makeup book because I love doing makeup but I never learned the proper way to put it on my face, half of the time I'm doing what I think works and experimenting. Sometimes I struggle with finding the right products to use on my face and how to use them. In the book Bobbi Brown Makeup Manual, it goes over various tips helpful to beginners to professionals. It helps you with tips for your skin, face, eyes, etc. I'm excited to see what I can improve on and learn to further my understanding on makeup.


MAKEUP KITS: This chapter goes over the importance of organization and how it sets you up to be successful later on when doing your makeup. It also talks about the basic makeup you need and the right brushes to use based on your needs.


"Being well organized is essential. Whether you're a minimalist whose makeup kit holds more than lipstick and powder or a working makeup artist who routinely totes around a complete collection of cosmetics, it takes a plan" (Brown 10). 


HOME MAKEUP: 
         You should always have your makeup neatly organized, it should never be thrown and left around in random places, this could cause your makeup to build up bacteria which is horrible to put on your face after. Personally, I like to keep my makeup on my small vanity/desk. "Organize your makeup either in your bathroom drawer, on top of the counter, or in a box. Keep basics and items used only occasionally separate" (Brown 10).  From my experience, I tend to make a mess every time i finish doing my makeup and leave it all over my desk so I will definitely use these tips on organization. Here i cleared my desk so I could start fresh and use these tips.


Here is a picture of my makeup organized. Products that I use often (left) and the products that aren't used as frequently (right). 


  BASICS/MAKEUP CARE

As Bobbi Brown states the basic makeup products include concealers/corrector, foundation, powder (two colors), eye shadow (three to four basic colors), eyeliner, mascara, blush, and lipstick/lip gloss. (10). In this picture I pulled out my basics to put on one side of my desk, because this is the makeup I use most often. This will help me reach them easier rather than leaving them wherever. You also want to make sure you don't keep makeup for too long! They have expiration dates. "Liquid/cream foundation (2 years), concealer (2 years), mascara (6 months), lipstick (12-18 months), eye shadow (2 years), and powder blush (2 years)" (Brown 20). Make sure to check your makeup often and throw out your old makeup, it could be harmful for your face and cause breakouts. 


ESSENTIAL TOOLS

        Brushes are essential to getting amazing and unique makeup tutorials. There are different brushes used for different makeup techniques. Most brushes that come with makeup compacts or kits are too small or they don't work efficiently to create various makeup looks. I personally like to shop for synthetic brushes as pictured because they tend to give me more control since they are more stiff. In this book there is also a tip to use your fingers because nothing beats the warmth to create an easier blending application (15). 


Do you think keeping makeup for longer time than the expiration date is okay? Do you tend to keep everything in order and organized or do you just leave everything wherever and don't care to keep everything in order?


Bobbie, Brown. Bobbi Brown Makeup Manual: for everyone from beginner to pro. Springboard Press, 2011.


Wednesday, November 29, 2017

Simply Glamorous: Eye shadow fundamentals

Hello, my name is Ashley, and recently I have been really into make up. Previously I have always done my make-up one basic way and never tried anything to fancy. I have been interested in learning new techniques and new ways to do my make up and that's when I got interested to buy a make-up techniques book. Today, more precisely I am working on the fundamentals of eye-shadow. This reflects on eye shape, eye and hair color, shimmers, matte, etc. After reading Gary Cockerill Simply Glamorous make up book, I have been introduced to the right techniques for different eye shapes, and the right colors to be applying due to eye and hair color. Here are some pictures of the look I created:


These are the colors I used to create the this look
As you can see there is shimmery pinks on my eyelids and hints of gold/brown in the upper crease. I was inspired to use these colors from Gary Cockerill,"Hazel eyes: Purples, rich gold, yellowy browns, dusty pinks, taupes... Red hair: Pinks, golds, greens, olives, black" (Cockerill 119). After reading this, I became much more clear on which colors to use on me to enhance my features. I really focused on the pinks as you can see in the picture.  Here are the colors for different eye colors, skin tones, and hair colors:


Also I was introduced to the eye shape I have. My eye shape is, "upturned, almond".  Knowing your eye shape will help you know where to apply the eye-shadow to give you the best look possible. Personally for me, according to Gary Cockerhill, with my eye shape I can apply eye shadow under the eyes. "The lower lids can sometimes be as pronounced as the top lids, which means you can put eye shadow under the eyes as well, for extra drama" (95). I decided to use this and it truly did complete the look. As you can see in the pictures below my eyes, I included a darker brown/gold color under the lash line.
Here are all the eye shapes that Cockerhill introduces:
This is the eye shapes Cockerill introduced

After reading these few pages from this book I already feel much more confident, and I hope this can a step to you being more confident in your skin! Knowing the right colors and where I should be applying these colors has made me much more confident to leave the house with eye shadow on. I hope you can include some of these tips the next time you are applying eye shadow. I also hope you can use the colors I used to create a look, especially if you have hazel eyes, like me. Also, looking at those pictures I included will help you significantly!

What colors do you think looks best on you? Are you an eye shadow kind of person? What is your eye shape?

Cockerill, Gary, et al. Simply Glamorous: Make-up Transformations to Make You Look & Feel Fabolous. Jacqui Small, 2015.

Monday, November 20, 2017

Chic Hairstyles: Part 1


Taming hair in the morning is stressful and time consuming, but what if there was a way to speed up this process. Well, there is! This hairstyle is both quick and easy, while still being elegant. It also suits all hair types from curly to straight and short to long! 

A book called  Braid, Buns, and Twists by Christina Butcher gives chic hairstyles that can be worn for all occasions. It provides simple how-to illustrations and photographs showing these breathtaking styles.


The first hairstyle I tried was the French Braid. I was interested in this hairstyle because the book stated “The French Braid sits close to your head and is a beautiful way to wear your hair up” (Butcher, 42). This means that this braid is a good way to get your hair out of your face. It also means the braid should start off tight so it is close to the head. From that I learned I had to start with smaller pieces of hair to achieve that. When I modeled this hairstyle on someone else, I started by using a basic braiding technique. Then, I started adding small sections of hair from each side all the way back down their head. Lastly, I secured the hairstyle with an elastic.

Tip: Make sure that the sections you add in are even (Butcher, 43). This is a really important tip because it helped me keep the braid keep straight.
Overall, I recommended this hairstyle because it is quick and easy to do. There are many variations to wear this braid, you can wear it loose for an effortless look or tightly for a more sophisticated one. It is very versatile and can be used on all hair types!
Would you wear a French Braid? If so, how would you  personalize it?
Make sure to read my next blog post to see what the next hairstyle will be!


Citation:
Butcher, Christina. Braids, Buns, and Twists!: Step-by-Step Tutorials for 82 Fabulous Hairstyles. Apple Press, 2015.


Friday, January 27, 2017

Chic Easy Hairstyles Part 5

For my last and final hairstyle, I would like to show you the Half-Down Twisted Topsy Tail. The thing that I like about this hairstyle is that you can get creative with how you want to do this hairstyle and it is so simply easy! All you have to do is split your hair in half and secure the hair with an elastic like a half-loose ponytail. Then divide the loose pony tail in two and bring the ponytail through the divided sections a couple times depending on how loose or tight you want to twist to be. In result, you have a Half-Down Twisted Topsy Tail, but you do not have to stop there. You can put a little more effort into making your hair look interesting by getting creative with the rest of the hair that is down. There are many options, you can form the hair into a braid you like or like what I did was curl the rest of the hair. Jenny Strebe in 5-Minute Hairstyles, also recommended to curl the hair to “help add volume” (Strebe 102).  


In all this hairstyle is great for beginners and above to practice getting creative with your hair, or you can leave it simple and still look good as Jenny Strebe says on page 102. I hope this hairstyle inspires you to get creative and have fun with your hair. What would you do to get creative with this hairstyle?