Showing posts with label simple. Show all posts

Sunday, January 28, 2018

30 Minute Sketching - Keep it Simiple

30 Minute Art - Sketching
By Alwyn Crawshaw


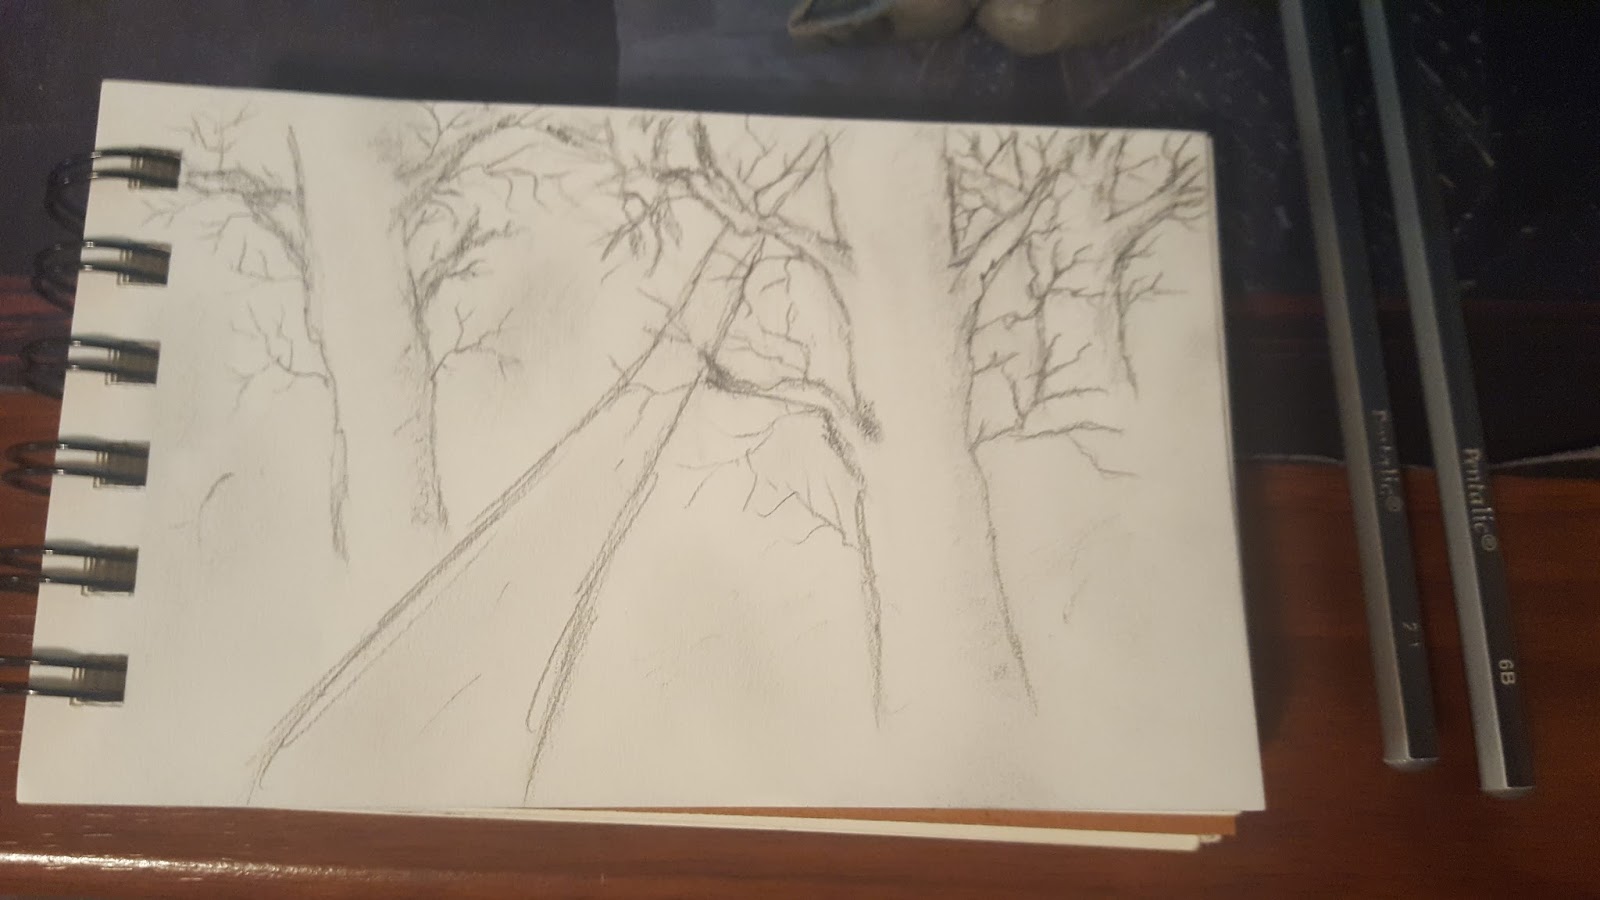
We've finally made it my final blog of this book, in this meeting I will look into Crawshaw's final major tip on sketching keeping it simple and quick. How he puts it into words is that "a non-painter sees everything, but an artist sees only what is important to his or her sketch" (Crawshaw 41). Using a few methods can bring up the habit of simplifying things more. For the most effective way would be too use only a long hold, as making it difficult to draw would drive you to putting in too much detail or putting any irrelevant details (Crawshaw 42). 

For this final drawing I will finally time myself to the 30 minute limit, it will be a simple small forest with a dirt road. I used a 2B pencil too put in detail and make out the drawing, while buffering it with a 6B pencil to make quick and quality shading. Coming out was this final product.


Alwyn Crawshaw's 30 Minute Art book, has probably been the most helpful tool I've gotten to improve my capabilities in drawing. To finally end off I want to know what has been the most helpful system of knowledge whether it is a book, website, or video?
Saturday, January 20, 2018

The wow factor

     I decided to do a full face look from the Lauren Luke Looks book by Lauren Luke called "The wow factor".

     In this look I used:
- Powder foundation brush
- e.l.f. eyeliner pen
-Revlon photo ready foundation
- Mary Kay powder foundation
-e.l.f "bold berry" (red lipstick)


This look is a fairly simple look. It's not too complicated, in my opinion. In the book Lauren Luke uses a "matte cream eyeshadow" (Luke 87) and I didn't have that so I decided to skip that step and do something else.
   
     First I put my Revlon photo ready foundation all over my eyelid as a primer and also to act as the "matte cream eyeshadow"(Luke 87).
    Next I did a winged liner. In the book Lauren Luke describes how to do a winged eyeliner, she states "Rest the little finger on your cheek and. Starting in the middle of the upper lid. draw a line extending to the outer edge and finish with a small flick"(Luke 88)

Keep in mind, when you are drawing the winged liner and you are doing the little flick, don't flick to hard. Just do little "flicks" kind of lightly and small flicks until you get the desired winged length.
   It definitely took me a couple of tries to get a decent wing liner, i'm still learning how to do it and every time I do a winged liner it gets better and better.
    {If on your first try you don't get the "perfect" winged liner, that's ok. Just keep trying, It will probably take you a few attempts or even a couple of days.}
The whole eye look was just that, see it's a simple eye look.

        Then I decided to put some powder foundation all over my face and wear a red lip, to tie the look together.


       In the book Lauren Luke added a heart to her cheek, but I decided not to do that.


Lauren Luke's look 


My look


You can totally play around with how you want the look to turn out, you can use a different lipstick, you can add eyeshadow, you can do anything your heart desires. You don't have to do exactly as I did it or as the book did it. Play around with different colors, go CRAZY,  and you will possibly like what you did.
      Now that you have seen this look, is this a look you would recreate? On a scale from 1 to 10(1 being very bad 10 being very good), how good are you at doing a winged eyeliner?

Wednesday, November 29, 2017

Eyeshadow look: Vintage gold

     I would call myself a beginner at makeup because this year I started to get in to doing makeup on myself. I'm not the best at it but by doing this I am going to have a little bit more insight to what I can do better. So I started off with a fairly simple look which is a "Vintage gold" eyeshadow look from Lauren Luke looks by Lauren Luke.
(Focus on the eyeshadow)

For this look I used:
*Revlon Photo ready foundation
*The 24K nudes
*e.l.f Essential Flawless eyeshadow
*e.l.f blending brush
*e.l.f eyeshadow brush
*MegaProtein mascara


           Starting off, I start with putting foundation all over my eyelids.

The foundation helps to keep my eyelids one color and not as oily (as you can see the one without foundation is a little bit oily and discolored). This kinda acts as an eye primer.
     Next I put on the gold/ shimmery brown color(The one that is circled) and put that as a base to my eyeshadow. In  Lauren Luke looks she(Lauren Luke) says that adding a base to your eyeshadow look "gives eyeshadow intensity. It really makes the color pop"(Luke 28).


            Then I put some gold eyeshadow all over my eyelids  and extend it to my inner corners but not past the crease of my eyelid.


          Now I add a black(circled in lavender), dark brown(circled in orange), and a little bit of a red/ maroon (circled in dark purple) eyeshadow to the outer corner of my eyes, to add depth to the eyes, and I blend the colors all together. In the Lauren Luke looks book Lauren uses a dark frosted brown eyeshadow, but the dark brown color that i used wasn't that dark and it wasn't to pigmented(so the color wasn't dark enough and it wasn't showing up as much), so that's why I added a little of the black and a little of the red/ maroon eyeshadow to make it more dark and "pop out"
Then with the same gold eyeshadow I take an eyeshadow brush and "gently feather"(Luke 96) it along my lower lash line from the outer corner to the inner corner. This technique of putting a light/ shimmery color eyeshadow along your lower lash line gives the illusion that your eyes are bigger.
Lastly I apply mascara to my lashes.


                           This is the final product.

I learned that by putting dark colors in the outer corner of your eyes adds depth to your eyes, I've always wondered why people do that and what the purpose of it was. This look is definitely not a "everyday look" but it's definitely something i'll consider doing again. After seeing the final product, would you consider doing this look? If so, where would you wear this look? 

Wednesday, January 25, 2017

Eve Waters Braid #2

Eve Waters
Hairstyle #2
Jan 25th


Hello Bloggers! Last time I showed you the basic 1 french braid down the back with my model Austin. Today I wanted to spice it up a little and show 2 dutch braids. I am still using the book "The Braid" By Sarah Hiscox and Willa Burton. On page 24 the braid is called "Naomi" . The author shows the amazingly easy ways to keep it simple and cute. I had Austin be my model to show what it would look on a girl with not super thick hair nor thin. So it was perfect to show anyone could try this on themselves. I used to not be a comfortable braider but now I have lots of confidence just from at least giving some of them at least a shot. Hope you enjoy and try this at home!


My first step was gather all my materials for the braid, such as a comb and hair ties. Next I parted her hair at a slanted direction so it is not a middle part.


Next you start on one side of your head the dutch braid. The goal is to keep the braid tight and sticking to the head so it wont come undone if you decide to sleep with them in. KEY: You aren't french braiding like you would go over, over under... You will start by going UNDER over (repeat). You want the braid to be popping out of your head sort of to make sure it looks visible.
Displaying Snapchat-230193133.jpg    Displaying Snapchat-1070542130.jpg

Continue on with under over until you reach the end of the ponytail and tie the hair tie on the end to insure it will not come undone. That is when you know that you are on the right track and have another braid left to go! Half way done!!
Displaying Snapchat-839782317.jpg

Continue on to do the next braid the same way as you did the first.

This is the finished product of what the hair should look like when you are done. Tight to the head and not to lose around the edges of her head.

Displaying Snapchat-1466981304.jpgDisplaying Snapchat-1667259305.jpg


This is what the book showed as the Naomi as an example.
Image result for dutch braid called the naomi


Hope you like the braids and keep viewing them!! Thank you for taking time to read this! Any braid requests next? Should I try cornrows? I think its time for a challenge. See you soon!!