Showing posts with label crafts. Show all posts

Sunday, January 29, 2017

Felting With Phoenix - Part 5

My friends, the time has come: Today is my last and final post for this project. For the last creation of this blog, I made a chipmunk. I'm very excited to show you guys this project, as I feel like it was a good opportunity for me to put together all of the new techniques I've learned from my book, Little Felted Animals. I noticed my major problem with my past projects is that the proportions are slightly off, making them look less realistic. To combat that, I put extra effort into creating "each part, referring to [the] full-size parts diagram as a guide" (Nishida and Tomoko 66). I used a new technique from the book that I learned in my first project, using a wire base to give the animal mobility. Putting wire through the base of the tail allows me to bend it into any position for display. I also learned how to add additional wool around the joints when attaching the parts to create a smoother look (Nishida and Tomoko 66). After I created all of the parts with reference to the full size image, this is what my base looked like:
Next, it was time to add the patterning. I expected this to be quick but actually took a lot longer than anticipated. The chipmunk has a series of stripes in light brown, dark brown, and a creamy white. I used the technique of "punching" in the lines to create a smooth finish, avoiding any fuzzy wool strands sticking out. Finally, I got to the face. I used an awl to pierce holes for the eyes, then put them in. I didn't have big enough eyes to give it the look I wanted, so I just punched in some black wool around them to make them appear larger. I added some wool to make the cheeks poke out in the signature chipmunk look, and punched in some stripes and ears. Finally, my last creation was finished:


In retrospect, I wish the face looked a little more realistic to match the reference picture. Despite that, I think that the body looks good and I'm proud of the patterning. The shape of the tail actually makes it look more like a squirrel than a chipmunk, but I don't mind.
Now that I've finished all of my projects, what do you guys think? Have I improved at all since the beginning, and what could I do differently? Have you ever tried to felt something on your own, and if you haven't would you want to?

Citation: Nishida, Kyoko, and Tomoko Kodera. Adorable Felted Animals: 30 Easy & Incredibly Lifelike Needle Felted Pals. Tokyo: Tuttle, 2015. Print.

Monday, January 16, 2017

Felting with Phoenix - Part 4

It’s that time again: "Felting with Phoenix – Part 4" is here! I’m proud to present my newest project, the American Tabby. I chose this for two main reasons. The first being that it is a more complicated project that is a good way to test the skills I’ve learned throughout this project, and the second being that my own cat is a tabby. The American Tabby is a classic cat breed, demonstrated, “with its big, erect ears, rounded face and sharp gaze,” (Nishida and Tomoko, 14). After closely studying the shape of the cat’s figure, I got to work. Only after starting the project did I realize just how many parts there were to make: The body, the front legs, the back thighs, the back feet, the tail, the head, the ears, the muzzle, and the nose are all separate parts that have to be made on their own, not to mention adding the coloring, markings, claw details and plastic eyes. Trying to follow the steps in an orderly fashion so as not to get overwhelmed, I created a simple cylindrical base. This gave me an idea of where to start and how large the other parts would need to be. As instructed, I started creating all of the separate parts, “smoothing with [my] fingertips as [I went], punching with the needle to create shape” (Nishida and 
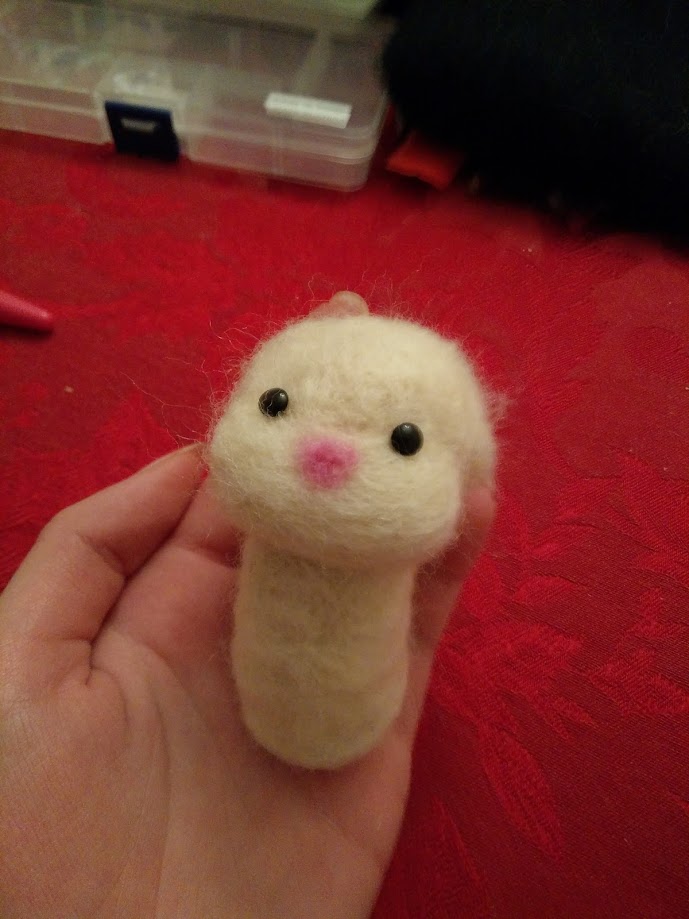
Tomoko, 29). After all of the leg parts were attached and I created the head, this is what I had to work with:
With that, my cat was starting to become visible through the wool blobs: It’s a glorious moment when you can start to tell that the arbitrary shapes are actually making something worthwhile. I created the tail, using Nishida and Tomoko’s technique of wrapping wool around a wire to give it bendability. Once I made the shape for the ears, I had all the pieces I needed, and it was time to start the surprisingly time-consuming process of wrapping the gray coloring around the oddly-shaped figures.

For the head detailing, I put black plastic eyes in the cat’s head and felted green rings around them to give them a color pop. I put gray wool over the tops of the eyes to give them a realistic lidded look. I put on a ball of white wool with a pink nose and a thin black threaded mouth. On the body I followed a similar process, wrapping gray around the back and curling the darker gray markings around the legs and back. To make it look more like my cat, I wanted to give the tabby a fluffy spot on its chest. To accomplish this, I used a technique from the book “Adorable Felted Animals” of implanting small layers of white wool on the cat’s chest, working up from the bottom and trimming as I go (Nishida and Tomoko, 32). Finally, the body, tail, and head were completed, color and all. I wrapped some loose wool around the bottom of the head to act as glue for the connection then felted it on, repeating the process for the tail. At last, my creation was finished:


Overall, I’m proud of the results of this newest project. I feel like the felting methods I’ve learned from “Adorable Felted Animals” have really helped me improve my art projects. Do you guys agree? What’s your favorite animal, do you think it would be hard to recreate in felt?


Citation: Nishida, Kyoko, and Tomoko Kodera. Adorable Felted Animals: 30 Easy & Incredibly Lifelike Needle Felted Pals. Tokyo: Tuttle, 2015. Print.

Wednesday, January 11, 2017

Felting With Phoenix - Part 3

Hey everyone! Part 3 of the felting series is finally here, this time with a little bit of color flare. For my latest blog, I've created a small fluffy rabbit. The book, Little Felted Animals, displays them in boxes, but I prefer them on their own and as such only created the animal itself. Three examples of the rabbits are shown, displaying their customizability by stating, "you can change their look by slightly altering the color combinations" (Nishida and Tomoko, 24). Using the techniques I learned from their book, I created one of the "Three Kinds of Rabbit(s)"

A basic circle used as the base for the rabbit's head,
featured next to my main 3-needled felting pen
To start, I made the head's base, a circle. I used a 3-needle pen as it was quick, non-detailed work that is easier when multiple needles can be used at once rather than just one. Next, I created the body as a simple cylindrical figure. Following the steps, I tilted the head upwards and attached it to the body (Nishida and Tomoko, 75). Now that I could see the basic form of the pieces coming together, I could start adding some details. I used the implanting technique to add plush wool cheeks, giving the rabbit a more friendly look. After the shape was in place, I added the ears by following Nishida and Tomoko's instruction to "fold edges of ears in at the base and attach (them) to head" (Nishida and Tomoko, 75). Finally, I made a small sphere and attached it to create the tail

The book's examples of the rabbits in the felted box
The rabbit's final shape, without the face details


Now that my rabbit was fully made, some personal-preference design issues were at hand. Due to my decision to create the animal without a box as depicted, I had already added details that weren't necessarily included in the intended design, while still using techniques the book showed me.  After that, I decided to go more out of the box. I left the rabbit limbless to give it a simplistic look, and continued the trend with a simple pink nose instead of the cross-over design in the book and finished it off with small plastic eyes.

To the left is the front and back view of the finished product. Overall, I think it turned out well even though it's not exactly as the book pictured.

What do you guys think? Should I stick to the book next time or make my own invention? Which color choice would you have chosen: White, brown, gray, or something else entirely? I'm excited to hear from you!

Citation: Nishida, Kyoko, and Tomoko Kodera. Adorable Felted Animals: 30 Easy & Incredibly Lifelike Needle Felted Pals. Tokyo: Tuttle, 2015. Print.

Thursday, December 8, 2016

Felting With Phoenix - Part 2


Welcome back to part two of my felting adventures! This time I wanted to try something new using some techniques from the book, but I felt like making another dog wouldn't be beneficial to my learning process so I decided to create a sheep, despite it's absence from the book. One piece of advice I used from my book, Little Felted Animals, says that "The size and firmness of the finished project depends on the amount of punching, so allow more wool felt than you may need" (Nishida and Tomoko, 33). I took this to heart when felting the base of my sheep, using a large chunk of wool to create a neat circle, which I then felted some black wool over to make it the right color. The book said to start with a base of black wool, but I only have white in bulk so I started there and layered over it to create the same effect.

To the left is a photo of the base for my creation, before the extra color was added. Clearly it’s not a perfect circle, but that won’t be visible after the outer layer is added. The left side is the base, and the right shows what the wool looks like before it is shaped.


After adding color, I felted about 18 or so small spheres, a few white and a few gray. Shaping with my fingers and punching the wool in tightly to create shape (Nishida and Tomoko, 29), I spent a significant amount of time shaping what felt like countless of these tiny shapes, and by the time I had to do the same thing for the legs I was ready to give up the monotonous task. However, I continued on with the head and the eyes, giving the creation a cartoon-like look rather than the realistic effect I was aiming for in my last project. Finally, I used the book’s implanting techniques to attach all of the parts and my adorable sheep was finished. ­­The photo to the upper right is the wool pieces after I attached them, and below are some photos of the finished product!


Now that I've tried both, which do you guys prefer: Realistic or cutesy? Do you think I've improved from my last post?

Citation:
Nishida, Kyoko, and Tomoko Kodera. Adorable Felted Animals: 30 Easy & Incredibly Lifelike Needle Felted Pals. Tokyo: Tuttle, 2015. Print.

Wednesday, November 30, 2016

Origami: A revisited hooby

Origami has been a hobby that I've wanted to further expand on since the most I've been doing has been folding square sheets of paper into paper cranes to make a wish. I chose to expand my horizons and fold more intricate pieces as well as make my folding look clearer. 

One of folds I've struggled with the most since I've started origami is the beginning folds from corner to corner. The book Easy Origami by Dokuohtei Nakano gave a solution to this problem. They give a tip after joining the opposite corners, "Place the top two corners exactly together with your forefingers. Still holding the corners together with your forefingers, make a crease along the bottom with your thumbs. Firmly press the crease, using your thumb as an iron" (Nakano 5). I tried this technique, this resulted in a clean line with a clean line that did not show any of the plain side of the paper. 


I decided to fold a simple sea bird because if I had failed in my folding, then I could test it by attempting to float the origami bird on water. By using the already folded paper, I folded a sea bird provided by the book itself. The bird was created from folding both ends to the crease and reverse folding to create the simple piece (Nakano 50). Sure enough, the bird could float and ensured that I did not miss fold any vital parts. While it couldn't float for very long, the surface created showed that I folded correctly.

Does anybody has a suggestions on improvement such as tips or more complex origami?

Tuesday, November 29, 2016

The Art of Origami

The Art of Origami 

When i was a bit younger i used to make origami. I made the easy and basic things i found off online like frog, crane, fish, etc. So the reason i have decided to base my blog on origami is because i not only want to learn to make new things but also learn things that are more in depth with the art of folding. I hope by the end of this i will have gained a stronger knowledge of origami.

In the book "Origami Art" by Michael G. Lafosse and Richard L. Alexander they discuss the history of origami, techniques,display, and also talk about a origami art gallery called the Origamido studio. As I read on i immediately learned a lot about origami some of the things i learned are the types of paper used, how to stretch paper, and also what made the authors interested in origami. The authors say "a fascination for transforming a single square piece of paper into something wonderful"(.Michael G. Lafosse and Richard L. Alexander, 5) This shows how someone can become hooked onto origami due to how interesting and fascinating the art of origami is.

So the book also includes various step by step tutorials on how to make a few pieces of origami. So I've decided to create something simple to start off with. I created what they call a modular flower. The book says that Modular flowers have been popular origami subjects at the Origamido Studio... We have chosen thee models to illustrate the world of compound origami projects and displays(Lafosse, Alexander, 106). I think that what they are trying to say is that art has a way of presenting something even if its just through a piece of paper.

So the book recommended using something called duo washi paper which is a unbleached or non dyed Japanese paper which made of the fibers of mitsumata, kozo, or gampi. So i didnt i have to i just used plain old origami paper i had.So the instructions were very detailed and were clear since there were also instructional photos.


So this is the final product which i think turned out pretty nice, im pleased with the outcome. The only concern i wish i knew what certain folds were since the instructions didnt visually show them.

So do you think that i should i try making something more elaborate with more techniques? Also do you have any recommendations/tips to origami?

LaFosse, Michael G., and Richard L. Alexander. Origami art: 15 exquisite folded paper designs from the Origamido Studio. Tokyo: Tuttle Pub., 2008. Print.

Thursday, November 24, 2016

Felting with Phoenix - Part 1

Everyone needs a friend, so why not make your own? For this project I’ve decided to try the art of needle felting with the aid of the book “Adorable Felted Animals,” by the Gakken Handmade Series. I have minimal experience with this craft, and I chose this book because I wanted some insight on felting realistically rather than the extremely stylized cartoon figures I’m used to making. For those that don’t know, needle felting is “a form of craft in which a special needle is used to create shapes from wool” (Nishida and Tomoko, 26). The wool catches in the special slits in the needle. The needle works to mat together the wool and transform it into felt when it is poked repeatedly (Nishida and Tomoko, 26).
Diving right in, I decided to make a golden retriever for my very first creation. I started with a wire base, forming it into the shape of the letter T (Nishida and Tomoko, 28). Then I wrapped some wool roving around it and punched it with the needle to create a base figure.
To the left is the core of the dog. Not very lifelike yet, but don’t worry. I added some wool to the base to “flesh [it] out and create shape” (Nishida and Tomoko, 29), and then moved on to work on the head. Starting with a simple circle, I spent a good amount of time solidifying it because “the more the needle is worked in and out of the wool, the firmer the figure becomes” (Nishida and Tomoko, 26). I added the snout, nose and mouth, then the ears. This seems simple but actually takes a great deal of time. I used “implant roving” to create fur on the ears to give the fuzzy effect of the puppy’s ears. Shown below is the finalized head, minus the ears

After the head was finished, I used the book’s techniques to attach the head to the body. I used simple needle-felting tactics to create the hind legs and haunches, as well as the tail. After all of this was attached, it was time to give the dog some fur. This is a completely new technique to me that the book describes as “implanting.” Using small scraps of wool and pushing them into the fur over and over again, working from the bottom up, I turned my simple dog into a giant fluff ball.

I used a toothpick to brush it out and make it smooth, and then it was time to trim. Here are some angles of the finished product:


Overall, this book has taught be some useful techniques, but I definitely need some more practice. What do you think, does it look like I followed the steps correctly? What would you try to make first?

Citation:
Nishida, Kyoko, and Tomoko Kodera. Adorable Felted Animals: 30 Easy & Incredibly Lifelike Needle Felted Pals. Tokyo: Tuttle, 2015. Print.