Showing posts with label Arts. Show all posts

Wednesday, November 22, 2017

Creative Drawing: Shadows and Realism

David Phan
Drawing: The Only Drawing Book You'll Ever Need to Be the Artist You've Always Wanted to Be by Kathryn Temple

Simply drawing shapes and figures is great, and even looks really nice if you have a knack for it. But what really makes your drawing pop, what makes it seem alive? Kathryn Temple delves into the concept in the book Drawing: The Only Drawing Book You'll Ever Need to Be the Artist You've Always Wanted to Be. Temple's introduction to Chapter 3 really shows the importance of shadows, saying, "To make our drawings look as realistic as possible (or three-dimensional), we need to recognize that an object's shadows really define the shape of that object" (Temple 34). This shows how shadows in drawings accentuate the realism of a piece, which is a huge step in becoming a better artist! Temple continues by explaining how the process works: identify the shadows, differentiate the lighter and darker toned shadows, then apply them using techniques of your choice. She even adds examples of shadow techniques you can use (Temple, 35). By doing so, she provides a simple step-by-step procedure to create a more refined and realistic drawing.

Trying these techniques out was a blast. The artwork without the shadows was just an outline sketch of the bear (and not the greatest looking one either!), which takes more time than artistic capabilities. The transformation from no shadow to shadow was amazing, and the final product is shown below. Here, I used my old teddy bear as my test subject. The realism is truly displayed in how the lighting and position of the object is shown. In my drawing, the shadow shading technique I used was hatching, in which you represent shadows with rows of small lines, making them darker and closer for darker shadows. I used the advice given by paying attention to the different shades of grey in the shadows, and drawing them accordingly to make the drawing more vivid.


What do you think about adding one thing to a piece of artwork dramatically changing the result? Do you believe there are more important factors to the detail and realism of a piece than shadows? And if you had to choose an object to draw shadows for the first time, what would you choose to draw and why?


Works Cited

Temple, Kathryn. Drawing: the Only Drawing Book You'll Ever Need to Be the Artist You've Always Wanted to Be. Sterling Children's Book, 2014.

Sunday, January 29, 2017

Felting With Phoenix - Part 5

My friends, the time has come: Today is my last and final post for this project. For the last creation of this blog, I made a chipmunk. I'm very excited to show you guys this project, as I feel like it was a good opportunity for me to put together all of the new techniques I've learned from my book, Little Felted Animals. I noticed my major problem with my past projects is that the proportions are slightly off, making them look less realistic. To combat that, I put extra effort into creating "each part, referring to [the] full-size parts diagram as a guide" (Nishida and Tomoko 66). I used a new technique from the book that I learned in my first project, using a wire base to give the animal mobility. Putting wire through the base of the tail allows me to bend it into any position for display. I also learned how to add additional wool around the joints when attaching the parts to create a smoother look (Nishida and Tomoko 66). After I created all of the parts with reference to the full size image, this is what my base looked like:
Next, it was time to add the patterning. I expected this to be quick but actually took a lot longer than anticipated. The chipmunk has a series of stripes in light brown, dark brown, and a creamy white. I used the technique of "punching" in the lines to create a smooth finish, avoiding any fuzzy wool strands sticking out. Finally, I got to the face. I used an awl to pierce holes for the eyes, then put them in. I didn't have big enough eyes to give it the look I wanted, so I just punched in some black wool around them to make them appear larger. I added some wool to make the cheeks poke out in the signature chipmunk look, and punched in some stripes and ears. Finally, my last creation was finished:


In retrospect, I wish the face looked a little more realistic to match the reference picture. Despite that, I think that the body looks good and I'm proud of the patterning. The shape of the tail actually makes it look more like a squirrel than a chipmunk, but I don't mind.
Now that I've finished all of my projects, what do you guys think? Have I improved at all since the beginning, and what could I do differently? Have you ever tried to felt something on your own, and if you haven't would you want to?

Citation: Nishida, Kyoko, and Tomoko Kodera. Adorable Felted Animals: 30 Easy & Incredibly Lifelike Needle Felted Pals. Tokyo: Tuttle, 2015. Print.

Thursday, January 26, 2017

ART- Drawing, Painting, and Photography - The Artist's Handbook

For my final post I wanted to focus on lighting. Lighting is very important for a picture as it gives the photo certain emotion and feeling towards it, and besides what is a picture if you cant even see what the photo is of.


IOS 800
For a Canon EOS Rebel T5 I found that when working with lighting the aperture comes in to play (in which was discussed in my last post). Although this does affect the picture  the IOS of your manual setting does as well. Your camera's IOS scale goes from auto to 6400. As you go higher up the scale the pictures become a lot brighter so when in certain situations, adjusting this to your setting is fairly helpful. Especially when you have a specific layout for what you what that photo to look like. Like Smith says "the type of lighting in which a photo is viewed has a great influence on its appearance."


IOS 1600

For this photo taken I had used it for my last post to show how aperture can effect physical appearance of the photo. With this post I hope to show the IOS and lighting of a camera, with an everyday object because "all good art prompts the viewers to look again at everyday objects and event with a new focus and a new perception" (Smith 322)

To me having the ability to control the way your viewers see things is a game changer. To be able to tell a story with a single picture or even artwork coming from your own perspective. Not only does this help me grow as an artist but as a person when learning new skills that can later benefit me. 

What has helped you grow with new skills and knowledge?
In what ways do you think lighting can affect the "backstory/deeper meaning" of the picture?


Wednesday, January 25, 2017

jumping origami frog

origami 

Hello everyone! Today we will be making something fun easy and a little funky, this a middle level of difficulty but also can be fun to make, according to the book Michelle talks about “frogs signifying friendship” “by pressing on the hind legs the from will jump” a moving origami, how much cooler does that get! Let us get started!


1.     Fold the paper in half sideways to make a rectangle.
2.     Fold the corners down and unfold them right away, repeating this for both top corners of your rectangle.
3.     Flip the paper over and fold the top of the paper down at the spot where the diagonal creases meet. Unfold right away.
4.     Flip over once again, and fold the two edges toward you so they meet each other. The top of your rectangle will fold down to form a triangle
5.     Fold the bottom of the paper up so that its edge meets the bottom of your triangle. Fold the two corners of the triangle up to form the "front legs" of the frog.
6.     Fold the sides inward to meet at the center.
7.     Fold the bottom of the paper upward so its edge touches the bottom of the "legs," and unfold right away.
8.     Insert your fingers into the inside of the flaps, and pull the bottom corners outward to the sides, so that the bottom edge comes up to touch the bottom of the "legs."
9.     Fold the corners down so they meet at the bottom of the figure.
10.  Fold the bottom corners outward to form the "back legs" of the frog
11.  Create a zigzag fold at the bottom of the figure, folding the bottom half up and then the bottom quarterback down.
12.  All done 


how far did you make your frog jump?

Monday, January 16, 2017

Felting with Phoenix - Part 4

It’s that time again: "Felting with Phoenix – Part 4" is here! I’m proud to present my newest project, the American Tabby. I chose this for two main reasons. The first being that it is a more complicated project that is a good way to test the skills I’ve learned throughout this project, and the second being that my own cat is a tabby. The American Tabby is a classic cat breed, demonstrated, “with its big, erect ears, rounded face and sharp gaze,” (Nishida and Tomoko, 14). After closely studying the shape of the cat’s figure, I got to work. Only after starting the project did I realize just how many parts there were to make: The body, the front legs, the back thighs, the back feet, the tail, the head, the ears, the muzzle, and the nose are all separate parts that have to be made on their own, not to mention adding the coloring, markings, claw details and plastic eyes. Trying to follow the steps in an orderly fashion so as not to get overwhelmed, I created a simple cylindrical base. This gave me an idea of where to start and how large the other parts would need to be. As instructed, I started creating all of the separate parts, “smoothing with [my] fingertips as [I went], punching with the needle to create shape” (Nishida and Tomoko, 29). After all of the leg parts were attached and I created the head, this is what I had to work with:
With that, my cat was starting to become visible through the wool blobs: It’s a glorious moment when you can start to tell that the arbitrary shapes are actually making something worthwhile. I created the tail, using Nishida and Tomoko’s technique of wrapping wool around a wire to give it bendability. Once I made the shape for the ears, I had all the pieces I needed, and it was time to start the surprisingly time-consuming process of wrapping the gray coloring around the oddly-shaped figures.

For the head detailing, I put black plastic eyes in the cat’s head and felted green rings around them to give them a color pop. I put gray wool over the tops of the eyes to give them a realistic lidded look. I put on a ball of white wool with a pink nose and a thin black threaded mouth. On the body I followed a similar process, wrapping gray around the back and curling the darker gray markings around the legs and back. To make it look more like my cat, I wanted to give the tabby a fluffy spot on its chest. To accomplish this, I used a technique from the book “Adorable Felted Animals” of implanting small layers of white wool on the cat’s chest, working up from the bottom and trimming as I go (Nishida and Tomoko, 32). Finally, the body, tail, and head were completed, color and all. I wrapped some loose wool around the bottom of the head to act as glue for the connection then felted it on, repeating the process for the tail. At last, my creation was finished:


Overall, I’m proud of the results of this newest project. I feel like the felting methods I’ve learned from “Adorable Felted Animals” have really helped me improve my art projects. Do you guys agree? What’s your favorite animal, do you think it would be hard to recreate in felt?


Citation: Nishida, Kyoko, and Tomoko Kodera. Adorable Felted Animals: 30 Easy & Incredibly Lifelike Needle Felted Pals. Tokyo: Tuttle, 2015. Print.

Wednesday, January 11, 2017

Felting With Phoenix - Part 3

Hey everyone! Part 3 of the felting series is finally here, this time with a little bit of color flare. For my latest blog, I've created a small fluffy rabbit. The book, Little Felted Animals, displays them in boxes, but I prefer them on their own and as such only created the animal itself. Three examples of the rabbits are shown, displaying their customizability by stating, "you can change their look by slightly altering the color combinations" (Nishida and Tomoko, 24). Using the techniques I learned from their book, I created one of the "Three Kinds of Rabbit(s)"

A basic circle used as the base for the rabbit's head,
featured next to my main 3-needled felting pen
To start, I made the head's base, a circle. I used a 3-needle pen as it was quick, non-detailed work that is easier when multiple needles can be used at once rather than just one. Next, I created the body as a simple cylindrical figure. Following the steps, I tilted the head upwards and attached it to the body (Nishida and Tomoko, 75). Now that I could see the basic form of the pieces coming together, I could start adding some details. I used the implanting technique to add plush wool cheeks, giving the rabbit a more friendly look. After the shape was in place, I added the ears by following Nishida and Tomoko's instruction to "fold edges of ears in at the base and attach (them) to head" (Nishida and Tomoko, 75). Finally, I made a small sphere and attached it to create the tail

The book's examples of the rabbits in the felted box
The rabbit's final shape, without the face details


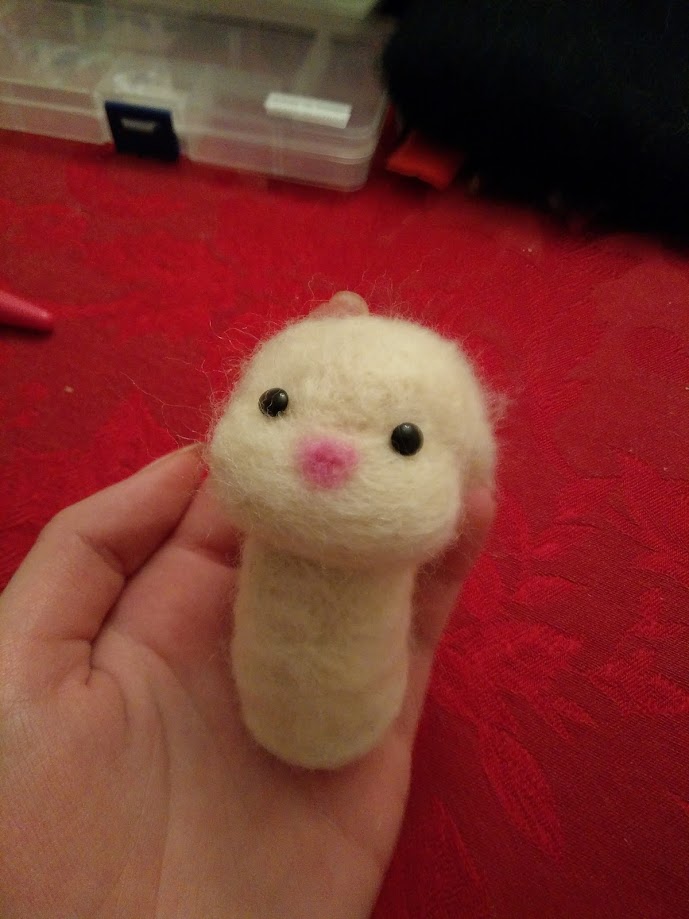
Now that my rabbit was fully made, some personal-preference design issues were at hand. Due to my decision to create the animal without a box as depicted, I had already added details that weren't necessarily included in the intended design, while still using techniques the book showed me.  After that, I decided to go more out of the box. I left the rabbit limbless to give it a simplistic look, and continued the trend with a simple pink nose instead of the cross-over design in the book and finished it off with small plastic eyes.

To the left is the front and back view of the finished product. Overall, I think it turned out well even though it's not exactly as the book pictured.

What do you guys think? Should I stick to the book next time or make my own invention? Which color choice would you have chosen: White, brown, gray, or something else entirely? I'm excited to hear from you!

Citation: Nishida, Kyoko, and Tomoko Kodera. Adorable Felted Animals: 30 Easy & Incredibly Lifelike Needle Felted Pals. Tokyo: Tuttle, 2015. Print.

Monday, December 19, 2016

Origami

Origami  
Welcome back! Today I will be doing my second post. After doing my simple ninja star I found a more complex ninja star in my book, if you want something more simple, go check out my first post! Today we will be doing an 8-sided ninja star! This is definitely a lot more complicated than the original ninja star but as the author puts it “origami is an art where you don’t use glue, tape or scissors, you don’t decorate it after it is complete, and all you have to have is a piece of paper to make something extraordinary”. So let’s get started and make something extraordinary!1   You will need to start off with different colored sticky notes (this will be much easier than normal paper)

2.     Take the Square Origami Paper and fold it twice diagonally and another two times to get the bisecting crease. 
3.     Fold inwards, two of the top corners, using the middle crease to help you  
4.     Overlap both the triangles and fold in the top crease in between the two folded triangles. 
5.      Fold all the other papers in the same way 
6.      Insert one paper unit in the other and lock it by folding the corners 
7.     Insert all the paper units like this and lock them in the same way by folding the top corners of the triangle.
8.     You will get a complete circle in alternating colors. 
9.     Holding the paper circle in one hand firmly, rotate the paper in push out the paper units. 
10.  in the end you will get a pinwheel like design in the center and star like sharp spikes forming an easy paper Ninja Star.

How difficult was this one? can you make a 16 sided one?

Wednesday, November 23, 2016

Origami

origami 

  1. Welcome to my blog! Here we will be learning a few simple, detailed Origami folds, origami is a Japanese art of folding paper into decorative shapes and figures. I have enjoyed doing origami since I was a little girl, it helps take my mind off things, but I really didn't know how to do any harder ones so I wanted to learn and get better. The book I used for this is called “Essential book of Origami” by Michael G. LaFosse, this is the a very basic form of origami that is very easy to follow, through the book Michael starts off with simple origami that leads into harder ones.
    The first thing we are going to make is called a ninja star, this consist of many folds of same sizes paper. This can be a little challenging in the beginning and may take a few tries to get, (it took me a couple times to get it good) you can make then any size and color, but I would start with a medium size going too small or too large can be more difficult. I will be making them out of origami paper (if this is too hard, use sticky notes to start off with they keep their forms and stick to each other)
    1.     Start off with two pieces of paper, you can use two of the same, but two different colors will be much easier to see and follow the folds
    2.     Fold them in half (hot-dog style)
    3.     Fold both halves of each paper to meet into the center of the crease, this is called a cupboard fold
    4.     Now fold each paper in half along the vertical axis
    5.     Fold in half along the horizontal axis
    6.     Now fold the corners over into the middle with both pieces of paper
    7.     Now make a fold through the center
    8.     After this is done to both rotate one 90 degrees and place them on top of each other so they are perpendicular
    9.     This is where is can get tricky fold the vertical one into the horizontal one, if you have the correct folds you will have a little pocket to stick them in
    10.  Flip the star over and do the same thing, stick the little piece into the opposite color and your ninja star should be done!
     Related image


  1. What would you do differently than the book?