Showing posts with label Nathan Cho. Show all posts

Sunday, January 29, 2017

3-D Geometric Origami Post #5

Nathan Cho
Geometric Origami #5

For my last post I decided to make a Three-Loop Cubohedron. Personally the piece seemed really easy until it came to assembly which was the most difficult and confusing part of the piece. The books says "When reading a step of the diagram you must pay careful attention to all of the information in the step" (Gurkewitz and Arnstein 10). The way the book usually shows directions that are pretty easy to follow but this piece got pretty confusing towards the end. A quick note all  make before going into how to  make it, the module pieces are fold the exact same way as my very first piece, the Puzzle Cube.

Step 1: You're going to want to start with six of the modules used to create the Puzzle Cube
 Step 2: Next, you're going to want to connect two modules by unfolding the center of the piece and put the point of another piece into the center of the open module and fold it closed. Connect four of them to create a circle and connect the remaining two together.
Step 3: For this step you're going to collapse all the triangles inbetween the diamond patterns on the circle and other piece.
Step 4: The assembly process of both parts isn't easy to describe but one tip i have is to make a a triangle with three of the diamonds like shown in the picture below.

Notes:
I definitely think the easiest part was creating the modules because of how i had already made it before. Without a doubt the hardest part of this creation is that the assembly. Not only is the assembly process awkward and difficult but the instruction are pretty vague and unclear.

Question:
So when the instructions to something aren't clear do you try to decipher the directions or do you go on your own trying to do it you way? 


Saturday, January 28, 2017

3-D Geometric Origami Post #4

Nathan Cho
Geometric Origami #4

So a common theme or trend among my past folds was that they were very square or cube like. The module in this post is called the Modular Dimpled  Dodecahedron Ball, the differences of this piece is that the general shape of is triangular and it requires a connector to connect the modules. Since there are two different parts you can either fold all parts then go assembling or fold each part and add as you create more parts. The authors says "One might try to put modules together in groups of three and then put the groups together. I find this style more difficult than having a model 'grow' piece by piece" (Gurkewitz and Arnstein 12). Personally i just added piece by piece for this piece but i don't think it was a major factor into making it.

Step 1: To begin with you're going to want to start with a square piece of paper and fold it in half, corner to corner, and create a triangle. On the triangle fold and unfold on side so it touches the bottom of the triangle
 Step 2: Using the crease for a guide , fold a corner to the end of the crease line
 Step 3: So for this step you're going to fold and unfold the top part on the line. Then on the very lowest triangle fold it in half and unfold it.
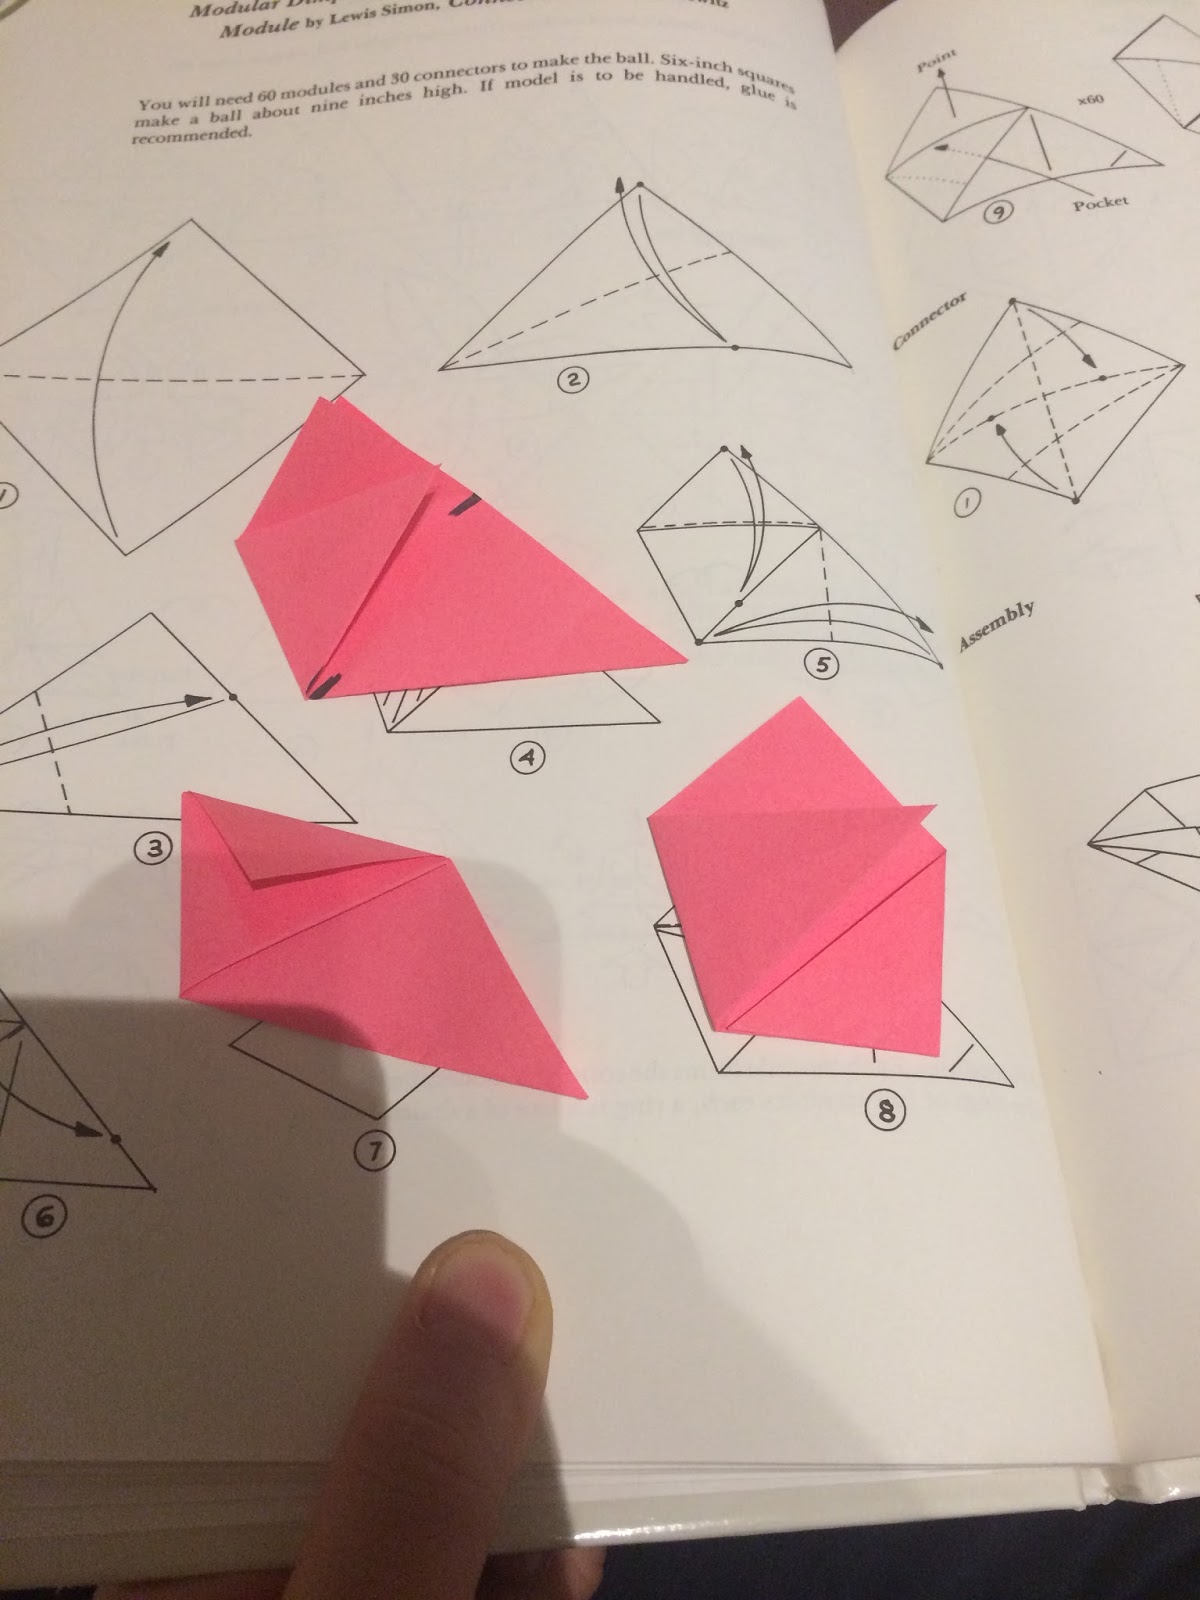
 Step 4: You're going to next fold the top half over the bottom so that a tip is poking out and then fold and unfold the tip over to the main body. Then unfold the upper half

 
 Step 5: Separate the top piece fold the front piece into the pocket in the middle piece.
 Step 6: These modules use the pockets and points. The pocket is underneath the center piece where the arrow is pocket and the point is found on the top piece, the point is also highlighted in black. If connect six different modules you'll create a cone.

 Step 7: To create the connector take a square paper and fold the corners so it'll form a parallelogram. Then on the shorter sides fold the corners into the center again.


 Notes:
Overall, this piece was pretty easy even though it's kind of different from all my other modules. The fact that this one had connector didn't make it anymore difficult. I think that these modules were easier than the previous.

Question:
The question I want to ask you guys is when making a multi-part creation do you build all the pieces first before assembling or do you assemble each part as you create them 

Saturday, December 31, 2016

3-D Geometric Origami Post #2

Nathan Cho
Geometric Origami #2

So the next thing I decided to make was the Small Rhombicuboctahedron designed by Rona Gurkewitz. This module is definitely more difficult than the previous one I built as the Rhombicuboctahedron required much more time and patience. The process of folding and arranging the module wasn't as cleanly done as the book instructs but the end result is alright. Again like last time i'm going to walk you guys through the steps of creating the module.

Step 1:
You're going to want to begin with a square piece of paper then fold and unfold each corner to the opposite corner. Then fold each corner into the center of the paper and unfold it. With the smaller triangles on the corners fold the tips into the base of the triangle and refold the whole triangle back to the center.
 Step 2:
You're going to want to turn the paper around and again fold the corners into the center of the square so there's a cross in the middle. Finally fold the tips of the square again but point the tips upward and you'll be done with the first module. You're going to need to create a total of 18 of these modules in order to create the Rhombicuboctahedron.
 Step 3:
Once you have all the modules you're going to want to connect them by folding down the tip of a point and insert it into a the pocket of another point and repeat until you're able to link eight of them in a circle.

 Step 4:
Link three more modules and attach it to the top of the circle by inserting a point on one end and insert a point on the opposite side of the circle
 Step 5:
Add two more modules to the remaining points of the top middle piece creating a kind of dome
 Step 6:
Recreate the dome on the bottom and you'll have  a Rhombicuboctahedron.
Notes:
So overall the entire process of creating this thing took over an hour for me as creating over 18 piece as some had to be scraped because they didn't fit or didn't turn out as i wanted. Arranging the Rhombicuboctahedron also took some time as some points wouldn't fit or stay in place so I kind of cheated and stapled some points together to keep the module together. Folding the pieces was pretty easy but arranging the pieces was definitely the hardest task and the book even says " The difficulty of assembly may be intermediate even though the difficulty of folding the individual modules is simple" (Gurkewitz and Arnstein 10).

Question:
So i definitely scrapped some pieces due to them being less then ideal but i also kept many which were close to being good but weren't. My question is, when folding origami or creating anything, do you guys keep going when you make a small mistake or do you redo it and do it perfectly?