What is available light? According to Chris Gatcum, available light is, "any light that exists in a location before they set up a flash or other lights." (Gatcum 122). Altering light to fit my photos was another aspect of photography that I found very difficult to accomplish, but after reading the chapter about available light I feel as if I am much more comfortable and have gained some more knowledge about altering light for my photos.
The first thing I learned that I never knew before was that there are two types of ways that light falls; hard or soft (Gatcum 122). What this means is that in soft light, the image looks less intense meaning that there are less shadows and highlights in the photo. Hard light is the direct opposite since it has shadows and creates a seemingly sharper photo. The photos below are an example of hard light vs. soft light.
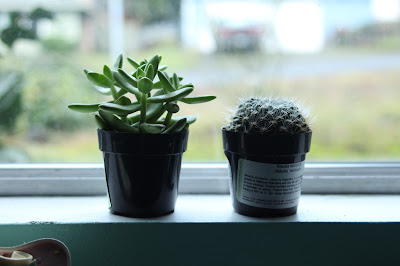 |
Hard Light
White Balance: Cloudy |
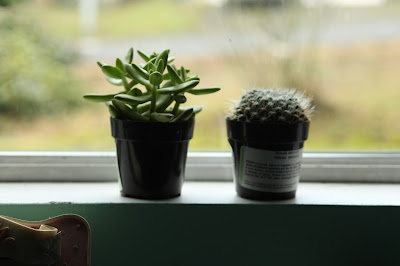 |
Soft Light
White balance: Tungsten |
Notice how in the two photos above, one has more shadows than the other. To change the setting of the light, I changed my white balance settings. White balance is a setting that is related to light and depending on what setting you choose, there are different colors of light. According to Gatcum, the higher the temperature of the photo [measured in Kelvin], the more blue the photo looks (Gatcum 124). In the photos above, there is also the white balance setting written down. The tungsten white balance has a temperature of 3200K meaning that the photo is going to be brighter and have a "sunset/sunrise" tone (Gatcum 124) while the cloudy white balance has a temperature of 6000k meaning that it as an "electronic flash" [or blue-like] type of light (Gatcum 124). By comparing the photos, you can see the differences between the lighting and the significance of choosing a white balance.
In this chapter, I also learned about how ISO and aperture help when taking photos in a dimly lit room. Gatcum states, "Set a relatively wide aperture. An aperture of around f/5.6 will let in plenty of light but still provide a modest depth of field" (Gatcum 136). The author also states to "Increase the ISO" (Gatcum 137), so I raised it to 800. The photo below shows the ISO and aperture working hand-in-hand to develop a reasonable photo in an indoor area.
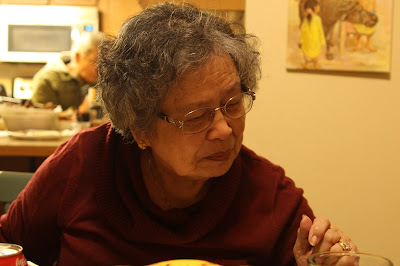 |
ISO: 800
Aperture: f/4 |
Take into account how in the photo above, I used a high ISO and a wide aperture to create a photo that is neither too dark or too light.
Overall, I learned that there are a variety of white balances that I can use to take photos and each white balance has a different shade. On top of that, ISO and aperture also play an enormous role in the lighting of a photo. My question to you readers out there is; Do you prefer a more bright, yellow-orange tint in your photos or a sky, blue tone?


No comments:
Post a Comment