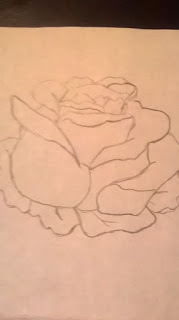
Last time I drew an eye, which was pretty interesting and I felt like I
improved my shading skills. This time I thought I’d try my hand at drawing a
rose. I even had to draw a rose for my chemistry class for the periodic table
since I got rhodium. The origin of the name comes from the Greek work “rhodon”
meaning “rose.”
First the author of my book, "How
to Draw Cool Stuff: Basics, Shading, Texture, Pattern and Optical Illusions,” Catherine
V. Holmes tells us to start by drawing a simple rose petal.
After drawing the simple rose petal you
have to simply “extend off of the rose petal continuing the simplistic design
towards the right.” (Holmes, Pg. 79)
Continuing with the drawing, we draw the
petal which resides on the right side of the rose.
With more details, we continue upwards by
adding small petals.
The small petals then connect together
and form the base of the rose. Now we can see more of the rose and see how this
way of drawing the rose is very simplistic.
By continuing down and drawing the
exterior petals of the rose we finish it off.
But not before adding a few leaves at the
bottom of the rose, which extend from the base itself.
Adding a few sharper leaves adds more
detail as well.
Finally, we add the stem and finish our
simple rose drawing off.
I thought that this way of drawing a rose
was very interesting. The author used one petal to extend off of the other and
complete the drawing without adding too much complexity. This is easy for
beginners like me and I thought it was amazing.
What do you think of this way of drawing
a rose?


Cool flower.
ReplyDeleteIf I were drawing this rose, I would probably just do all the lines at once, not doing each individual layer. Your way looks a lot better than my way though.