Thursday, December 31, 2015

HTML & CSS - Lists

There are numerous occasions where we need to use lists. In the third chapter of Jon Duckett’s HTML & CSS, we learn about the different types of lists and how to create them on your webpage. HTML provides three different types of lists: ordered lists, unordered lists, and definition lists.

Ordered lists are lists where each item is numbered. For example, steps of a recipe would use ordered list because you must perform them in order. An ordered list is created with the <ol> element. Items in the list should be placed between the <li> opening tag and the </li> closing tag. Say, for example, the first step to create a cake is prepare and gather your materials. You would write this as <li>prepare and gather materials</li> in between your <ol> and </ol> elements.

Unordered lists are lists without numbers and are normally bulleted. An example of this type of list can be a grocery list. An unordered list is created using the <ul> element. Like the ordered list, each item in the list should be placed between the <li> opening tag and the </li> closing tag. Unordered lists are very similar to ordered lists but they simply have no organization or sequence to them.

Definition lists are lists that consist of a set of terms with their definitions. A definition list is created using the <dl> element. The <dt> tag is used to indicate which term is being defined. My way of remembering that this tag is used for the term is that I use the “t” in “dt” to represent “term.” Along with the <dt> tag is the <dd> tag that contains the definition.

Lists allow us to organize our content in a way that allows our audience to see how many points we are covering. It is another organizational method for your webpage. If you have a disorderly webpage, it may not attract as big of as an audience as you had expected. In my previous post, you can see how my list of artists and songs were simply separated by commas and looked more like a paragraph rather than a list. After using my new skill in creating lists in HTML, I was able to create a much more visually appealing format of my content. By creating lists to organize your content, your audience is able to read through it easily.

Do you believe lists are an important part of webpages?

Below you will see how I used an unordered list to organize my content in the HTML page I have been working on that discussed my musical preferences.
View in TextWrangler
View in Safari

Raw vs. JPEG shooting

Do you know when to shoot raw or JPEG? DO you even know what these words mean? "JPEG stands fro Joint Photographic Experts Group. IT's a file format that was developed for digital photography, and it has become a universal standard, able to be viewed anywhere, straight from the camera. Raw stands for... raw. It's simply a fine format in which the raw, unprocessed data from the camera sensor is stored. Unlike JPEG's, raw formats are specific to different camera manufactured and models, and you need specialist photo editing software to open, view or edit them" (Byng 134). What they are saying is that they are different ways to store and share files of photos. JPEG's are different for each camera and Raw is the same for every camera. but we still don't know wen to use them.


JPEG's are the most convenient optionx for sure. you can share your information instantly, smaller files and you don't take up as much space on your memory card or disc file. "to achieve this small size, however, JPEG's have to be compressed in-camera, and some picture information has to be discarded in the process. Raw pictures, on the other hand, are uncompressed, and this means they're big files - your memory cards will fill up faster, and the photo take longer to transfer form the camera;s buffer to the card, too... however, we still recommend shooting Raw in a wide range of circumstances. the bigger advantage is that you can alter many of the camera's shooting settings even after you've taken the picture" (Byng 134-5). the raw picture is more versatile and you do a lot of neat effects with them. 


Even though it sounds like Raw is better than JPEG pictures, you still need to find a right balance. if you shoot a lot of Raw pictures, then your memory will get filled up fast and JPEG you cant edit the pictures as well. find the balance and you can make great pictures.

Using your flash on your DSLR camera

One of the biggest part of a camera is the flash. But did you know that that you can change the settings on your flash? They call the flash the "flash fill" because you can fill in the camera with as much light as you want. this means that if you wanted to use the flash do take away some shadows when it is in the day you can change the settings to where everything isn't washed away.


The handbook asks a question, "Why do you need a flash" (Byng 118) and I found that question dumb because most people know what the flash does, it takes away the shadows. The book takes this meaning into a deeper level, "DSLR cameras have a limited 'dynamic range' which means they can only record detail in parts o the picture that are a few stops darker or lighter either side of the exposure set by the camera" (Byng 118). Basically it is saying that the camera can only focus on of the exposures to focus on so you cant change both parts of the image. So what you would do is have the exposure set to the brightest part of the image and use the flash fill the complete the other part. The flash will only be used to "fill" in the shadows and not overexpose the rest of the picture.


with flash                                             without flash


The flash seams very straight forward but what I found interesting is that you can change the settings of the flash. Luckily the book comes with a step by step instructions:
"1. Most of the cameras have a flash composition button. press this, then rotate the Quick Control Dial to adjust the built-in flash power - you'll see it change in the display
2. Press the Q button to activate the Quick control screen on the LCD. Highlight the flash compensation symbol, and rotate the main dial to adjust the settings.
3. Delve into the menus and you'll find a setting for controlling the compensation value of the flash. You can also adjust the power of the flashgun attached to the camera
4. Alternatively, if you're using a hotshoe-mounted flashgun, you can adjust the power via its own compensation buttons (which take priority over in -camera settings, and monitor the changes on its LCD" (Byng 119).


Flash is used in many situations but mostly it is used in portraits. many times the sun creates a shadow over the face of our image. Your problems get even worse if your subject is backlit by  a bright sky or wearing a hat to put his face in darkness. When multiple problems appear you can use the flash fill to open up those shadows. You can pop up the flash and use it to through away those shadows. Even if you aren't using a portrait this technique will work.


"Fancy using fill flash for more dramatic effect?" (Byng 120) Dramatic effect is what makes every photo unique, and you can get that effect with the flash fill. One way is to over expose the background so that the subject is more contrasted in the photo. what you do is take the meter of the back ground and make the stops just 1 or 2 stops darker than recommended. use the flash and fire away. There are also many more effects you can pull off with this setting. Sometimes not using a flash can add a special effect in itself with all the shadows. 


Flash is a great way to enhance your pictures. In some cases you must rely on the flash to make the picture even relatively decent. there are many settings in the camera that are hard to use but the flash is the easiest one to use. If you are a beginner for the cameras, try and figure our the flash, it could help a lot.

Amarpreet Singh: Drawing a Rose

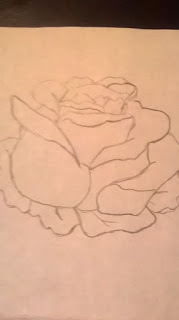
Last time I drew an eye, which was pretty interesting and I felt like I improved my shading skills. This time I thought I’d try my hand at drawing a rose. I even had to draw a rose for my chemistry class for the periodic table since I got rhodium. The origin of the name comes from the Greek work “rhodon” meaning “rose.”

First the author of my book, "How to Draw Cool Stuff: Basics, Shading, Texture, Pattern and Optical Illusions,” Catherine V. Holmes tells us to start by drawing a simple rose petal.
After drawing the simple rose petal you have to simply “extend off of the rose petal continuing the simplistic design towards the right.” (Holmes, Pg. 79)
Continuing with the drawing, we draw the petal which resides on the right side of the rose.
With more details, we continue upwards by adding small petals.
The small petals then connect together and form the base of the rose. Now we can see more of the rose and see how this way of drawing the rose is very simplistic.
By continuing down and drawing the exterior petals of the rose we finish it off.
But not before adding a few leaves at the bottom of the rose, which extend from the base itself.
Adding a few sharper leaves adds more detail as well.
Finally, we add the stem and finish our simple rose drawing off.
I thought that this way of drawing a rose was very interesting. The author used one petal to extend off of the other and complete the drawing without adding too much complexity. This is easy for beginners like me and I thought it was amazing.


What do you think of this way of drawing a rose?

Starting to Play Music and More Chords

Hi everyone! In this post, I'm going to begin actually playing music as well as learning more chords. I have previously played piano for about 4 years so reading music wasn't very new to me, but it was good to refresh my memory.
"Important. The lines do not refer to the strings of the guitar" (Evans 39). This was definitely important to note because it was very easy for me to automatically think that, for example, the low e note was on the second to last string on the guitar simply because the stave (the lines that the notes are written on) looked like guitar strings. When playing certain notes on the guitar, it requires you to place your fingers on the correct fret and string. For example, the low g note is simply just the third string played by itself while the low a requires you to put your second finger (pointer finger) on the third string but on the second fret (Evans 40). Once I familiarized myself with the notes, I attempted to play the song shown below. I had to start of a little slow, but after practicing it a couple times, it was actually pretty easy.
Next, I continued to learn more chords. The first chord I tried to play was the F chord, which is used in many different songs. "Two strings are pressed at the same time by the 1st finger for this chord" (Evans 42). I found that playing this chord was exactly like the F and C notes I had played earlier so it was not very difficult to figure out.
It was important for me to notice that for the F chord, it's better not to play the chord with the fifth and sixth strings, as displayed by the two X's in the diagram. After the F chord, I moved onto playing the C chord, which is commonly found in many different songs as well. The C chord required me to not strum the fifth and sixth chords, similar to the F chord, so it was easy to get the hang of it.
A Minor chord

Do you think it is more difficult to play chords where you don't strum certain strings (such as the F chord) or chords where you strum all six strings?

Running Into the New Year


Isaiah Eller

Today I ran on the Lake Youngs Trail with the one and only Isaac Derline. I only went 5 miles, but did so in 33 minutes for a average mile pace of 6:37. After my run I was very exhausted, and my legs really hurt due to the quick pace and hills we encountered. "Muscle cells routinely suffer microscopic damage during running. The accumulation of such damage is likely to be a major cause of fatigue during prolonged running. Whenever you complete a run feeling sore, you know you experienced significant muscle damage." (Fitzgerald 55) This quote shows that during my run I worked my muscles so hard that they started to tear my muscles, however, this is good for them because it helps them to grow back stronger. This photo is of Fanuel and I with Jack Yerian, state champion prior to Districts this year. In addition to my running I have been swimming twice a day with the swim team. This is good cross training for me, and helps my leg and core strength along with my cardiovascular fitness. "Today many elite runners perform cardiovascular cross training workouts throughout the training cycle to facilitate recovery from hard runs and to provide an additional aerobic training stimulus." (Fitzgerald 136) Overall my training has been fantastic this winter break as I have gotten faster and gotten my fitness level up. In your sports do you do other kinds of exercise as cross training?

Inner Child; Tie Dye Style

I don't think that people ever really grow out of the childhood stage, they simply mask it with the ideas and attributes of adulthood. See, people don't want to grow up, sure they want to do adult things, but most people will say that there favorite memories are those of when they were kids. The lack of responsibility, and the act of not caring is so present during the childhood years, and people often go through life chasing after the same thing. Now mess isn't always a bad thing. I've come to realize that perhaps the reason kids enjoy tie dye so much is because of the mess factor, the joy of being able to throw around brilliant colors and create a messy little masterpiece without any objections from your parents. That's a dream right? Well after experimenting with tie dye myself, I've realized that I love it now just as much as I did when I was a little kid, hence my rambling about childhood and adulthood. In the book there is a passage about "the art of tie dye" and it relates to what I've been explaining. It talks about how Tie dye can essentially release your inner child. I may be analyzing this too deep, but this passage made an enormous amount of sense to me. Tie dye and all of its wonderful colors helps you reach the inner child that everyone has inside them.


This time I decided to take a more reckless approach to the shirt. Rather than using any sort of order I chose to attack the shirt with color. I sprayed on the color chaotically, of course creating a huge mess. the shirt seemed very saturated, unlike the first one. When I first tried this, the outcome of the shirt had a lot of white left on I, and although it still looked nice, I wanted it to have more color and zest. in order to improve on the color of the shirt, I went a tad bit crazy, and I didn't hold back with the color. Before I let loose with the color I chose a design; scrunch. Essentially you bunch it up, put rubber bands on randomly, and your done. This technique is fun because you have no idea what your final product will be. "Multiple bright colors can yield exciting results, or a subtle, refined look can be achieved by choosing a monochromatic pallet" (Simon-Alexander, 75). Personally I enjoy bright colors, perhaps that is reflecting my personality, or perhaps it has no meaning, but none the less I chose a variety of bright colors to create my masterpiece with. So my t-shirt was bunched, rubber bands applied, and dye ready; this is where it got fun. I haphazardly picked up each color and squirted away. It was brilliantly colorful, the whole shirt was infused with the brightness and beauty of those four simple colors. Its quite astonishing in fact how beautiful something as simple as color can be. I was done, and I was proud. My shirt was messy, colorful, and beautiful. I set it aside and waited over night for the color to process.

It was the next day and I was excited to get my shirt in the wash and be able to view the final product. After all of this I feel as though my second dying experience was better than the first. My overall shirt was more colorful, and in my opinion better looking, There was  less of a mess, and honestly this shirt was a lot more fun to create that the last one. I honestly recommend tie dye to anyone who is feeling creative or wants to connect with their inner child again. I have had a great experience tie dying and I'm excited to do more shirts in the future.


If you were to design a tie dye shirt, how would you design it?

Trent DeLucia: Teaching Your Dog Tricks 2

Teaching Bear tricks turned out to be a lot more enjoyable than training him so I decided to do that again.  Sitting wasn't much of a challenge for me to teach or for Bear to learn so I chose a more difficult one this time around.  Teaching Bear how to stand up will be a trick that tests both my teaching and his ability to learn new things.  The "Imitation Rule" teaching method that I used to teach Bear how to sit was very effective, but I have decided to use a new method for standing:

"Lure-Reward Training: The trainer entices the dog into the desired position by typically using a hand-held food lure, like a treat. For example, the trainer lures a dog to sit by placing a treat in front of his nose and moving it backwards over his head. The dog follows the treat or 'lure' into the desired position. Reinforcement is generally giving the food reward along with verbal praise at the completion of the desired behavior (Fugazza 43)."

Fugazza, Claudia. "Imitation." Do as I Do: Using Social Learning to Train Dogs. Wenatchee: Dogwise, 2014. 43. Print.

"Lure-Reward Training:
  1. Show your dog the treat.
  2. Move the treat in the direction/motion of the trick you want your dog to complete.
  3. If your dog doesn't pick up on the motion, force them to complete it until they get the general idea of the trick.
  4. Give your dog the treat and a lot of praise after each attempt whether failure or success (Fugazza 44)."
Fugazza, Claudia. "Imitation." Do as I Do: Using Social Learning to Train Dogs. Wenatchee: Dogwise, 2014. 44. Print.

Even though the example given with the "Lure-Reward Training Method" is sitting, it will work perfectly with teaching Bear how to stand.  I started Bear's lesson by showing him the treat.  After this I slowly moved the treat above his head so he was looking up at it.  I then moved it higher and higher so he was still very intrigued.  His first reaction was to bark and growl when it got too high.  I finally found the perfect height so he was able to stand up and eat the treat.  Even if Bear growled instead of standing, I still gave him a lot of praise and the treat as well.

It took about two hours for Bear to consistently stand when I showed him the treat.  After all this teaching, all I have to do to get Bear to stand is to put the treat anywhere above his head.  I showed my family what I taught him and they were very impressed on how quickly he learned.  Does Bear sound like an unusually stubborn dog, or do you think all dogs respond to training similarly to him?

HTML & CSS - Text

Now that we know the basic structure of an HTML page, it’s time we move on to learning how to add markup (tags) to the contents of the page to provide more meaning and structure to it. Within the second chapter of Jon Duckett’s HTML & CSS, I learned about structural markup which are basically elements that we can use to describe headings and paragraphs. I also learned about semantic markup which provide extra information. Semantic markup shows us where an emphasis is placed in a sentence or where a quotation starts and ends. This gives more meaning to the text.

We first learn about headings and their levels. Headings can be displayed at different sizes on browsers. The <h1> level is used for main headings and is the largest size. The <h6> level is the smallest size. These create sections so you can organize your text and create structure. Don't mistake the heading tag with a title tag because the heading is what appears in the actual page whereas a title tag appears in search engines and your browser's title bar.
When you look at a webpage, there is normally a heading to give you the gist of the content on the page thus making it appear more organized and professional which is what we’re aiming for.

The next area of focus within this chapter was paragraphs. In an HTML page, there is a specific way to format paragraphs. You use the opening tag <p> and the closing </p> tag to indicate the beginning and end of a paragraph. Automatically, your browser should display the paragraphs on a new line with some space between each paragraph. Although the browser will automatically show a new paragraph or heading on a new line, you can also add a line break. When desiring a line break, you may add the <br /> tag within your paragraph or sentence to create that new line. You can also create a break between themes by adding the <hr /> tag between paragraphs. This can be used when there is a change of topic in a book or a new scene in a play.

When adding meaning to the text, you may want to add strong or emphasis tags. The content of your <strong> element will appear in your browser in bold. The use of this element is mainly to emphasize the importance of your content. You can add the <em> element to indicate an emphasis that subtly changes the meaning of your sentence. Automatically, your browser should show the contents of an <em> element in italic. These two elements create a change in your content by adding meaning to it.

There are normally two elements that are frequently used for marking up quotations. These are the <blockquote> and <q> elements. The difference between a <blockquote> element and a <q> element is that a <blockquote> is used for longer paragraphs that possibly take up an entire paragraph whereas a <q> element is used for shorter quotes that sit within a paragraph. Another difference is that browsers display the <blockquote> element with an indent. Browsers normally put quotation marks around the <q> element. Both elements can use the cite attribute to indicate where the quote is from.

Abbreviations and acronyms are written a special way in HTML. For this, you use the <abbr> element. The full term is inserted into the opening tag to show what the whole term of the abbreviation is. For example, NASA is the acronym for the National Aeronautics and Space Administration. The element would be written as <acronym title=“National Aeronautics and Space Administration”>NASA</acronym>. It may sound complicated but it’s quite easy to understand once you understand the basics of HTML.

Citations and definitions have different elements as well. When referring to a piece of work such as a book, the <cite> element can be used to specify where the citation is from. Your browser will display the content in the <cite> element in italics. A <dfn> element can be used to show where you are defining a word in your text. “The <dfn> element is used to indicate the defining instance of a new term.” (Duckett 54). Some browsers may show the content of a <dfn> element in italics and some may not change the appearance.

I had created my own webpage with a musical theme (below). This was interesting to work on because it showed me how HTML may look complicated but once you understand the patterns and format, it's pretty simple. Although, at times, I became confused with where my closing tag went. Currently, my webpage doesn't look like much because I've only used my basic skills to create it. As I learn new skills, I will be applying them to the webpage to create it somewhat visually appealing. Although it may not be the next Facebook or Twitter, it is a start. Now that I knew the basics to HTML code, I had gone to a random website and clicked on 'view source' which allows me to see the HTML code of the webpage. I was able to understand why and how the webpage was formatted the way it was.

With these elements, we are able to add meaning and structure to the content of your HTML page. Every browser is different. "Browsers often display the contents of these elements in a different way." (Duckett 50). Structural markup and semantic markup are important because Google and other search engines see an HTML page without styles. The only way they understand which content is more important than others is through markup. For example, a business or company name can easily get lost within a paragraph tag with the other content without markup. But if you put the name within a <h1> tag, the search engine will know that it is more important.

If you were an expert at web design, what kind of website would you create?

Below is my example text using these elements.

View in TextWrangler
View in Safari

Braiding my own hair pt. 2

Much like my last post I will be focusing on mastering one type of braid on myself. This next braid is a rope braid, which can be very hard if you don't have 3 arms. Every time I have tried to do this on myself so far things have gone wrong, in the book, Smith says "Take the two peices of hair and twist, I always twist towards my face, but the two strands must be going in the same direction." (Smith, 487) So i put this to the test and began twisting them towards my face, this actually made it a lot easier to keep track of. however holding all of this hair in my hands was a little too much for me. In the book it says "If its too hard to hold and twist both in your hands, do one first and after bite down on the end, it may be gross but it keeps the twist." (Smith, 498). Reluctantly I tried doing one first than putting it in my mouth, surprisingly this help out a lot more than I thought. After i had twirled both towards my face, I twisted them together the opposite direction like I previously learned how to do on my first post. These new techniques definitely helped me out, I can now do this braid quickly and easily for when I'm running out to the store or something. So far which braid do you guys think looks best? Also when do you think one of these quick braids could come in handy for you?

Extreme Sports Drawing - Skateboarder

For my third entry into the blog, I decided that I would challenge myself and draw a skateboarder. This did not turn out as well as I was hoping. This drawing was mostly just of a person and drawing people is one of my weaknesses so I decided that I would try to draw it with the help of the book. This did not turn out well. The book ended up not being detailed enough for me to be able to replicate what it was shown in the book. It began as a stick figure frame, "Start with a stick figure frame of the skater, as shown." (AV2 24)
Step one of this drawing was to draw the above image, and the end product was as shown below
I was not able to replicate this with the amount of detail the book gave. I will continue to try to draw people in the future but I think that drawing people is a talent you have to be born with. My final product of my attempt to draw the above image is as follows: 
My mind could not seem to figure out how to draw the correct thing. This picture may look like I spent 10 seconds trying to draw it, but really the above image took me around 45 minutes to draw. The book only gives 8 steps to draw this image with not nearly enough detail, I think that the author could have done better. I thought that it would be a good thing to document my struggles with this project along with the good things. 

What do you guys think that I should draw next? Should I continue to try to draw people or should I stick to inanimate objects? Thank you for reading, please leave feedback. 

Trent DeLucia: Teaching Your Dog Tricks

My previous blog was focused on training Bear and helping him get rid of one of his bad habits, but this time I chose a more fun topic.  I'm going to teach Bear how to sit.  I know this may seem like a basic trick that all dogs should know, but he was never taught.  There are some great tips and tricks in the book Do as I Do, by Claudia Fugazza, that are going to benefit my teaching immensely.

Since I am new to teaching and training dogs, the "Preliminary Training" section of my book was a great place to start.  It gave me helpful tips on what to do and what not to do when I start teaching.

"3 things to do prior to training:
  1. Dogs cannot focus as well as they could on an empty stomach so start a training session after a small snack.
  2. Make your dog feel loved and start to encourage before you begin.
  3. Have treats out and ready to reward your dog with (Fugazza 15)."
Fugazza, Claudia. "Imitation." Do as I Do: Using Social Learning to Train Dogs. Wenatchee: Dogwise, 2014. 15. Print.

"3 things not to do prior to training:
  1. Too much physical exertion before teaching your dog a trick will cause drowsiness and lack of focus so avoid playing at the park, long walks, etc.
  2. Don't forget to refill the water bowl!  Dogs are more easily distracted while thirsty.
  3. You cannot be in an impatient mood while working with animals.  You will only frustrate yourself and the dogs (Fugazza 16)."
Fugazza, Claudia. "Imitation." Do as I Do: Using Social Learning to Train Dogs. Wenatchee: Dogwise, 2014. 16. Print.

These tips helped me to prepare myself to teach Bear his first trick.  I fed him two green beans for a healthy snack about twenty minutes before we started.  I also pet him for a few minutes and brought the treats from the pantry to the living room.  I skipped taking Bear on his daily walk so he wasn't so tired for his lesson.  I also refilled his water bowl and made sure I was calm and ready to teach him.  After this, I was ready to perform the "Imitation Rule" teaching method:

"The imitation rule involves the dog learning that the cue "Do it!" means "copy the behavior I have just demonstrated" no matter what it is (Fugazza 16)."

Fugazza, Claudia. "Imitation." Do as I Do: Using Social Learning to Train Dogs. Wenatchee: Dogwise, 2014. 16. Print.

I decided to use the imitation rule on how I'm going to teach Bear how to sit.  I sat down, stood up, said "do it," forced him to sit down, and then repeated.  I repeated these steps about six times until I finally didn't have to force Bear to sit anymore.  When he sat by himself after repeating what I did, I rewarded him with a treat. Eventually, I just had to say "do it," and Bear sat down without me having to sit first.

The video shows that Bear learned how to respond to the cue, "do it."  It only took about an hour to teach him his first trick.  My family and I were very pleased and I can't wait to teach him more.  What do you guys think is a more challenging trick that I could try to teach Bear next?

Extreme Sports Drawing - Formula One Powerboat

For my second attempt at drawing something out of my Extreme Sports Drawing book, I decided to draw a Formula One Powerboat. Power-boating is a lot like F1 car racing, which is what I drew in my last post. Powerboats can reach speeds up to 100 miles per hour in about four seconds. Doing this drawing was fun for me but also challenging. The powerboat had a lot more detail then the formula one car did.
 This picture is from after I had finished all the lines and sharpie'd it. The book's instructions on how to get to this point were a lot like the ones for the formula one car. The first step was, "Start with a stick figure frame of the powerboat, as shown." (AV2 12) This step is the authors way of trying to simplify the drawing as much as possible by making you draw simple shapes to start with. Step 5, "In this step, draw the hull on both side of the powerboat." (AV2 13) was the toughest step for me. This was a tough step because I had to precisely draw many lines within two small ovals while trying to keep a 3D look to the drawing.


The top picture the final product of my drawing and the bottom is what is supposed to look like. I do not think that this drawing is as good as my previous drawing. This was more tough for me then the last drawing because it was a lot more detailed. I also decided to color with crayons instead of colored pencils just to compare which one makes the drawing look better. I think that the crayons gave it a unique look. 

Even though this drawing was not as good as my last, I believe that I have still improved my drawing skills because I now have more experience with detailed drawings. What should I draw next? A Moto X Bike or a Rally Car? Do you think my drawing skills are improving? Should I color with crayons or colored pencils? Thank you for reading and please leave feedback. 

Paleo Cooking - Elise Jones

Moving into the recipe section of the book, Practically Paleo, I have found new dishes to make eating paleo easier. As I am a breakfast person, I found it difficult to find a variety of foods to make; especially ones that didn't involve grains and dairy products. So when the question "what can I eat for breakfast?" came up, I was answered with "real food! What other animal on the planet eats "breakfast foods"?You can eat anything for breakfast as long as you stick to the Paleo way of eating." (Sanfilippo, 119).

In the mornings, I typically go for the easiest and most filling breakfast option; eggs. Eggs are one of the main pillars of paleo eating, as they are in almost everything, and can be made in a variety of ways. Today I decided to make an egg recipe from the book, that incorporated other food groups.


The recipe included...
  • three eggs
  • a tablespoon of water
  • ham (chopped or shredded)
  • hash browns (optional)
  • coconut oil
(Sanfilippo, 252)

The dish turned out very good, and it will be something I make very frequently, due to the great flavor, and the nutrients it has. leading to the question, would you make this for breakfast?


Animal Balloons

Finkbeiner 1
Zack Finkbeiner
Mrs. Meara
Honors English 10
November 24 2015

Hello everyone as you already know my name is Zack and for my IRP Q2 book I chose "Crazy Creatures Balloon Modeling" by Top That!. The reason I chose this book was because I wanted to get my balloon animal making skills to improve. Last post I worked on creating my different twist and then tried them out on my dog and ladybug. This post I will show you how i continued to develop my skills and tried to create harder animals such as the mouse and the parrot. First I tried to create the mouse. While making the mouse I found that it was a lot like the dog but with smaller and more delicate twist. As the book says "Some very small bubbles make up this little character" (26, Top That!). I found this statement to be very true because on my first try to create the mouse i ended up popping it which has never happened before. Do you think that my mouse came out good, or that i should try it again in a later post?


After I felt i had succeeded with my mouse I decided to try something a little bit harder, the parrot and swing. when creating the parrot I quickly learned that it was a lot harder then it looked. Creating the parrot took me five tries and I'm still not sure if it came out great. on my fourth try I found out that in the book they used different sized balloons for the parrot and the swing and since I didn't have different sized ones I just had to live with the over sized parrot. Even though my parrot is oddly sized I still think that he came out pretty well, what do you think?
What do you guys think that i could do differently to create cooler or cuter animals in the future?

Samin Bahizad - Practicing left hand and playing octaves

 Hello,
After practicing my left hand I decided, this time, to practice my left hand again so I started from Exercise 13 again. In this lesson I understood what is allegro and the sign of f. "A few new symbols have been added to Exercise 13. The word allegro indicates the tempo, which means  'fast'. The f dynamic marking, which represents forte, means 'loud',"(Halpin, 30). After practicing my left hand again I tried to play octaves with the left hand. "In order to play an octave, you have to open up and stretch your left hand. The low note is played with your fifth finger, and the high note (located an octave above) is played with your thumb...Place your fifth finger on the low C key and your thumb on middle C and play Exercise 15... This is a good exercise to play often, so you can get accustomed to stretching the fingers on your left hand and getting the feel of playing octaves,"(Halpin, 31).
This was really because I have already practiced left hand so I was able to play octaves.


Camila Kang - Not Actually Human

Do you remember in art class you were forced to draw yourself? It didn't look exactly like you, but close enough. Drawing people is "the most challenging of ll subjects for an artist" because everyone is unique on their own (Barber 36). Drawing a face is to me one of the most difficult drawings I experienced now, because of my tendency to have it exactly right. The author talks about that "a common error that novices make is to concentrate on the face without paying much attention to the rest of the skull," even though "the rest of the head is much larger than the area occupied by the face" (Barber 39). This was my problem. I kept trying to perfect one small area, instead of looking at the rest of the picture. An exercise he explained was to show us that people aren't so different, and "realize that one face isn't more difficult than another, because all faces have a basic shape so similar that it's only final details of the features that make them so distinguishable" (Barber 41). So always remember that everyone is the same as everyone else, but unique at the same time.
My attempt to draw Robin Williams took awhile to make, after several times of drawing him. It didn't look horrible at all, but it's not him exactly.
First I did a basic layout of his face, which looked like a cartoon character than a person. The lines are where his eyes, nose and mouth should be, and some basic outlining.


 I filled in some details, erased some lines, and added some shade.
And the final picture. 


Chef Pres IRP - Baking Cookies Part 3

Preston Viltz

Meara

Honors English P4

Blog

December 31 2015

Hey Blogger, I'm back at it again. As you all know I am on my way of completing my task of becoming a better baker. And like I've said before, I bake for one, and only one reason, for the lads. For my sack of course, I decided to take my game to the next level and bake something incredibly difficult. And since I'm a beginner baker and I took on the challenge to do an advanced snack... well you know how that went. Sike, they were BOMB. So, I made the Raspberry French Macaroon. My reasoning behind baking this snack was that I wanted to bake a dish from my own culture (I'm a bit of French). I also hate almost every fruit except berries, so the raspberry was the perfect fit. Again, I used the recipe from Baking by Natalie Chapman. Now lets take a peak at my creations:

"Ingredients:

  • 1 1/2 cups finely ground almonds
  • 1 1/4 cups powdered sugar
  • 3 egg whites
  • 1/2 teaspoon vanilla
  • Dash salt
  • 1/4 cup granulated sugar
  • 2 teaspoons raspberry puree
  • 1 cup raspberry jam"
I put the egg whites, vanilla, and salt into a medium mixing bowl. And then I "beat with an electric mixer on medium speed until frothy." Picture below:


Next, I "stir in almond mixture" and raspberry puree. Picture below:


I piped out my mixture into circles on parchment paper and "bake for 9 to 10 minutes or until set" each batch at 325 degrees. I took them out of the oven and let them cool. Picture below:


I took a quality pic with my tasty macaroon as well:


I took on the challenge and I am content with the outcome. I plan on making these for my French relatives sometimes and hopefully they will enjoy. This snack was 10 times harder than my other two types of cookies. There were many more steps to completely this snack to perfection. I plan on making a chocolate caramel cookie next blog so hopefully that turns out great and takes my skills to the next level. Hope you enjoyed! ;)

Should I bake a cookie or brownie for my next blog?

Chapman, Natalie. Baking. Des Moines: Houghton Mifflin Harcourt, 2013